Wednesday, April 27, 2022

Tying My Own Apron Strings


I have never until recently worn an apron while working in the kitchen. My 83-year-old mother never has, despite having done more cooking, baking, and preserving than anyone else I can think of. However, while my mother never seems to get any food on her clothes when preparing food, I nearly always do, and I decided I was tired of putting on a fresh outfit on Saturday mornings (when I batch cook for the week and do laundry) only to have it acquire food splotches within the next few hours.

So, aprons. Which of course I was going to make. I decided I would sew three, as a supply of three would mean I could be reasonably confident that I'd always have at least one clean apron on hand. I found an apron tutorial online, and then I bought fabrics. I planned the apron colours with reference to both my clothes and my planned kitchen décor, which is to be cream, wood tone, and red, with touches of green and to have a poppy theme, and determined I would make a red apron, a green apron, and a brown and cream apron. For maximum versatility the aprons would all be fully reversible with a print on one side and a plain fabric on the other.       


The red apron. I love the Jacobean-style print I used for this one. Fabricland actually carried poppy print fabrics, but I found I didn't like the look of them. This one's close enough to being a poppy print for my liking. 

The apron tutorial I used called for the apron straps to be made out of one of the two fabrics, but I made one change to the style of the aprons by making the straps out of both fabrics so that they'd be reversible too, like the body of the apron. 

I do wish I'd cut the aprons to fit me better. I am very well-endowed, and in order to have the waist tie at my waist, I have to adjust the bib ties to wear the bib lower on my chest than I like. Cutting a longer bib would have prevented that, which I should have realized from the outset -- after all the dresses I've made for myself, it's not like I don't know my chest takes up extra length. But I didn't think of it, and by the time I clued in I was far enough along in the process that I didn't feel like going to the trouble of backtracking and fixing it. It's no big deal, though. I can wear the bib a few inches lower, and if/when I ever make another set of aprons, I will remember to tailor them better. 


I scored another lovely print fabric for the green apron. It's a William Morris-style Arts and Crafts print. It actually had the William Morris name on the edge of the fabric, which means it's probably licensed. It's a print that will go well with my Art Nouveau-inspired décor touches.


The third apron, with a solid brown fabric on one side and a cream stripe fabric on the other. By the time I was done making this one, I wished I'd made the entire apron in plain brown. I used brown thread on the brown side and ivory on the cream, and those stitches showed through on the opposite side when I was top stitching, to the detriment of the final appearance of the straps. But there will probably be times when I am glad I have a cream apron to wear instead of a brown one, so it'll do.

And now I can bake and boil and brew in style. 

Monday, April 25, 2022

Sewing Sleepwear


One spring day perhaps eighteen or nineteen years ago, I went shopping for a new summer nightgown. I was looking in Toronto's massive Eaton Centre, where one would expect there would be a good selection of pretty much anything, but though I spent a few hours scouring every possible store, I couldn't find anything I liked. I got frustrated. And then it dawned on me... perhaps I could make myself a new nightgown. I took the northbound train to Yonge & Bloor, where there was (at that time) a Fabricland, picked out and purchased a pattern and a fabric I liked, and was on my way home in half an hour. 

I've never bought any sleepwear for myself since that day. I sew my own cotton nightgowns for summer and plaid flannel pajama bottoms for winter, and pair each pair of pajama pants with a thrift shop long-sleeved t-shirt in a coordinating colour. My practice is to keep my nightwear drawer perpetually stocked with three nightgowns and three sets of pajamas, replacing individual items whenever necessary. I reuse the same nightgown and pajama pants sewing patterns over and over, which helps keep the replacement cost down to under $25 per nightgown/pajama set, and they always last for years. The result is attractive, comfortable, inexpensive nightwear. I'll just add here that I also do have a lovely little spring green embroidered silk chemise that was given to me years ago and that I keep for, um, "special occasions", but there's been a sad dearth of special occasions in my life of late years, sigh.  


This is the cover illustration from Simplicity 9505, which is the nightgown pattern I bought all those years ago. My pattern is considerably the worse for the wear, though it's still usable. I used option C, which is the short-sleeved nightgown you see on the right. I'm not sure how many times I've made it up -- perhaps seven or eight times? It is so easy and inexpensive to make, requiring only 1.5 metres of fabric, some elastic, and maybe two hours of work. I still like the pattern, but a few years ago it began to feel as though it was getting to be too young for me in style. And also too short -- it's never been safe for me to bend over in it. While I may be single, I do need to be considerate of my neighbours, who are nice people and deserve better than to be subjected to an entirely unsolicited peep show every time I run out to put out the garbage. I decided it was time to invest in a new nightgown pattern, one more suitable for a woman approaching her fifties.


After browsing through the pattern catalogues in the spring of 2021, I decided on the pattern you see depicted above, which is Butterick B5792, view B, which is the one in the middle of the front row  It's more work and expense than the old nightgown pattern (note the tucked bodice, and the lace and ribbon detailing, and it also calls for bias tape around the neck and sleeve openings), but I thought it was rather pretty. I might be using some of the style options at some point too. I could use view D with short sleeves if I want to make a plain nightgown with no ribbon trimming. I'm even thinking of making myself a long-sleeved plaid flannel nightgown in option D the next time I need a new pajama set. 


These are the patterns I chose for my new set of nightgowns: a green pinstripe, a tone on tone cream print, and a peach and gold floral. I'm not crazy about the floral and wish I had kept shopping around for something I liked better, but I can live with it.


I had some difficulty finding the beading lace for around the neckline. I think ribbons are pretty, but I don't like lace very much, as I find it too fussy and Victorian-looking. I don't think there's any lace in my entire wardrobe except for some narrow trim on some of my underwear. I didn't like the only beading lace Fabricland carried in the required width. I toyed with the idea of knitting or crocheting some beaded lace, and I may do that next time, but for this set of nightgowns I ordered 4 yards of a cream cotton eyelet lace from an Etsy vendor. Even with shipping the eyelet lace cost less than the Fabricland option, and it looked more like a ribbon than like lace.


Here's the green pinstripe nightgown, made in size medium with slightly larger than called for seam allowances. I couldn't find green ribbon in the right shade for it as I had hoped, so I just used a cream ribbon. 


I couldn't find peach or apricot ribbon as I wanted for the floral, and had to go with a ribbon that was a cream with a slightly peachy tone to it. But again, it looks fine as is.


Here's the cream one. I rather wished I'd gone with a crimson ribbon for it, but the cream on cream look is fresh and pretty enough. 


I had approximately a package and a half of single fold bias tape which I had thought would be enough to do these three nightgowns, but I ran short. It would have cost me $6.50 in TTC fare to make the round trip to the nearest Fabricland just to buy more, so I improvised, and made my own bias tape, which I used to finish the armholes on the cream nightgown. I had never made bias tape before, but it went so well I'm going to be keeping the technique in mind for the future. It saves money, and it can look better to have matching bias tape made out of the garment's fabric than to choose from the limited set of colours commercially made bias tape comes in. 

And now I have three new knee-length cotton nightgowns demure enough and classic enough to be age appropriate, and hopefully also airy enough for Toronto's hideously hot summer nights. 

Wednesday, April 13, 2022

Clothes-Providing Friends


One day in March 2020, while idly scrolling through my Twitter feed, I saw a tweet authored by my friend Christine in which she'd posted a photo composition of Celine Dion in two very unfortunate outfits that were reportedly styled by a friend of hers, with the query, "... if your friend does this to you on purpose, are they really your friend?"


I must admit that if a friend of mine tried to get me to wear any of these outfits, I'd question their understanding of me, their motives, and possibly also their sanity. I've made a number of pieces of clothing for Christine over the years (by my count, if I'm not forgetting anything, four sweaters, a suit jacket, and a jersey dress), and couldn't help thinking complacently that all of those pieces definitely looked better than... what you see in the photo above. 


Our little exchange of tweets on the matter got me thinking that it had been so long since I'd made Christine anything -- I believe she received the last item in 2010 -- that she had probably worn out all the things I'd given her, and I really ought to make her something new. I added "sweater for Christine" to my knitting project list and picked out a pattern for it, but I didn't get to it that year, nor in the following year. In late 2021, when I was working on a tartan table set for my friend Lindsie and deciding that it would be her 50th birthday present, I also determined that I would definitely get Christine's sweater made in early 2022, and that it would be her 50th birthday present. 


The sweater above is the Veneto Sweater, designed by Handmade Closet. It's a lovely design and it struck me as being perfect for Christine. I could just picture her in it. 

As for the yarn selection, Christine's favourite colour is cranberry red (two of the four sweaters I have made for her have been that colour), so I decided this sweater would be a cranberry red with, if possible, a variegated yarn in warm cream/tan/light brown tones for the contrast colour. Christine is blond with a tan skin and brown eyes, and such a colourway would suit her very well. 

It took a few yarn store visits to find what I wanted, but I eventually purchased 300 grams of Sandnes Garn Sisu Superwash in Cardinal (shade 4228) from EweKnit, and one skein of Pro Lana Golden Socks Fjord 4-Fach (shade 181).  


Here's the sweater, which knitted up without difficulty. I made it in a size 3, which has a 36" bust. I did make the body longer than specified in the pattern. Christine isn't tall (I'd estimate her height at 5'3"), but she has a proportionately long torso, and the 20.5" length called for by the pattern would be too short on her, so I added one inch to the yoke length and two to the body length. I also added waist shaping. The resulting sweater should fit. I've never measured Christine, but all of the pieces I've made for her have fit quite well. With knitwear, one can usually just eyeball the size. 


As with Lindsie's gift, Christine will also be getting a jar of my lavender jelly, two tissue cases, and some homemade cookies for her birthday. The plan is for me to host a birthday lunch for Christine and Lindsie at my house, as they were born just nine days apart and, though the two of them only know each other through me, they enjoy each other's company a lot and are very fond of each other. I have the menu and decorations planned, and I'm looking forward to giving my two closest friends what I hope will be a special and fun birthday celebration, with gifts that are more satisfactory and aesthetically pleasing than the outfits assembled by Celine Dion's friend.  

Tuesday, April 12, 2022

The Tartan Suit That Wasn't


For Christmas 2020, one of the items in my Christmas stocking was a piece of the tartan fabric you see depicted above. Unfortunately, the colours in the photo are not terribly accurate. When seen in person, the background green is a dark forest green, and the red is very dark, more like a burgundy. There was 4.5 metres of it, and I don't remember how wide the fabric was, but I think it was more than the standard 150cm/60" wide. This sizable roll of fabric was my crazy generous sister's idea of a stocking stuffer (we use... large... stockings in my family), and Alanna's expectation was that I would make a suit for myself out of it. 

It took some time for me to evolve a plan to use all the fabric (there was SO much of it), but my first concern was actually to identify the tartan. When I asked my sister where she had bought it, she told me loftily that she "never reveals her sources", so that was a dead end. (Alanna rather prides herself on her shopping abilities and takes her shopping Very Seriously.) 

I theorized that the tartan probably wasn't an official tartan, as if it were, it would have been labelled as such and Alanna would have told me what that label was, but I thought perhaps it might resemble one. I did a bit of cursory and discouraging googling, and then I turned to the Metafilter community as I tend to do when stymied on any sort of research. The consensus there was that it resembles the Princess Mary tartan.  

The Princess Mary tartan, which is based on the Royal Stuart tartan, was created in the twenties and named after George V and Queen Mary's only daughter, it then being the fashion to name tartans after the British royals. My fabric is indeed quite similar, except that it is without the lines of blue that are in the Princess Mary tartan, so I'm going with that.

That settled, I began to think about what I would do with the fabric. I didn't want a tartan suit, as I have no place to wear such a thing, and the fabric wasn't really my colour palette anyway. But I thought perhaps I could make a skirt, trousers, and a waistcoat out of it that I could wear. I estimated how much fabric it would take to make the three items out of the fabric, and then decided I would not make the trousers, but instead make just a skirt, waistcoat, and a set of placemats. The placemats wouldn't be for me, as they wouldn't go with my dining room, but I thought they'd make a nice gift for my friend Lindsie, and that her partner would like them too, as he has Scottish roots and he and his entire family is very into their Scottish ancestry. 


When thinking about the placemat design, I did some Pinterest research. I initially had ideas about doing some sort of applique design on one side of the placemats, perhaps of a Christmas tree or a stag's head, but I soon ruled that out. I saw a number of unadorned tartan placemats on Pinterest, and I liked the clean, spare look of them. Tartan doesn't need tarting up -- it stands on its own. Besides, fancy placemat design is wasted effort in the end, because one can't see the design once the place settings are on the mats.  

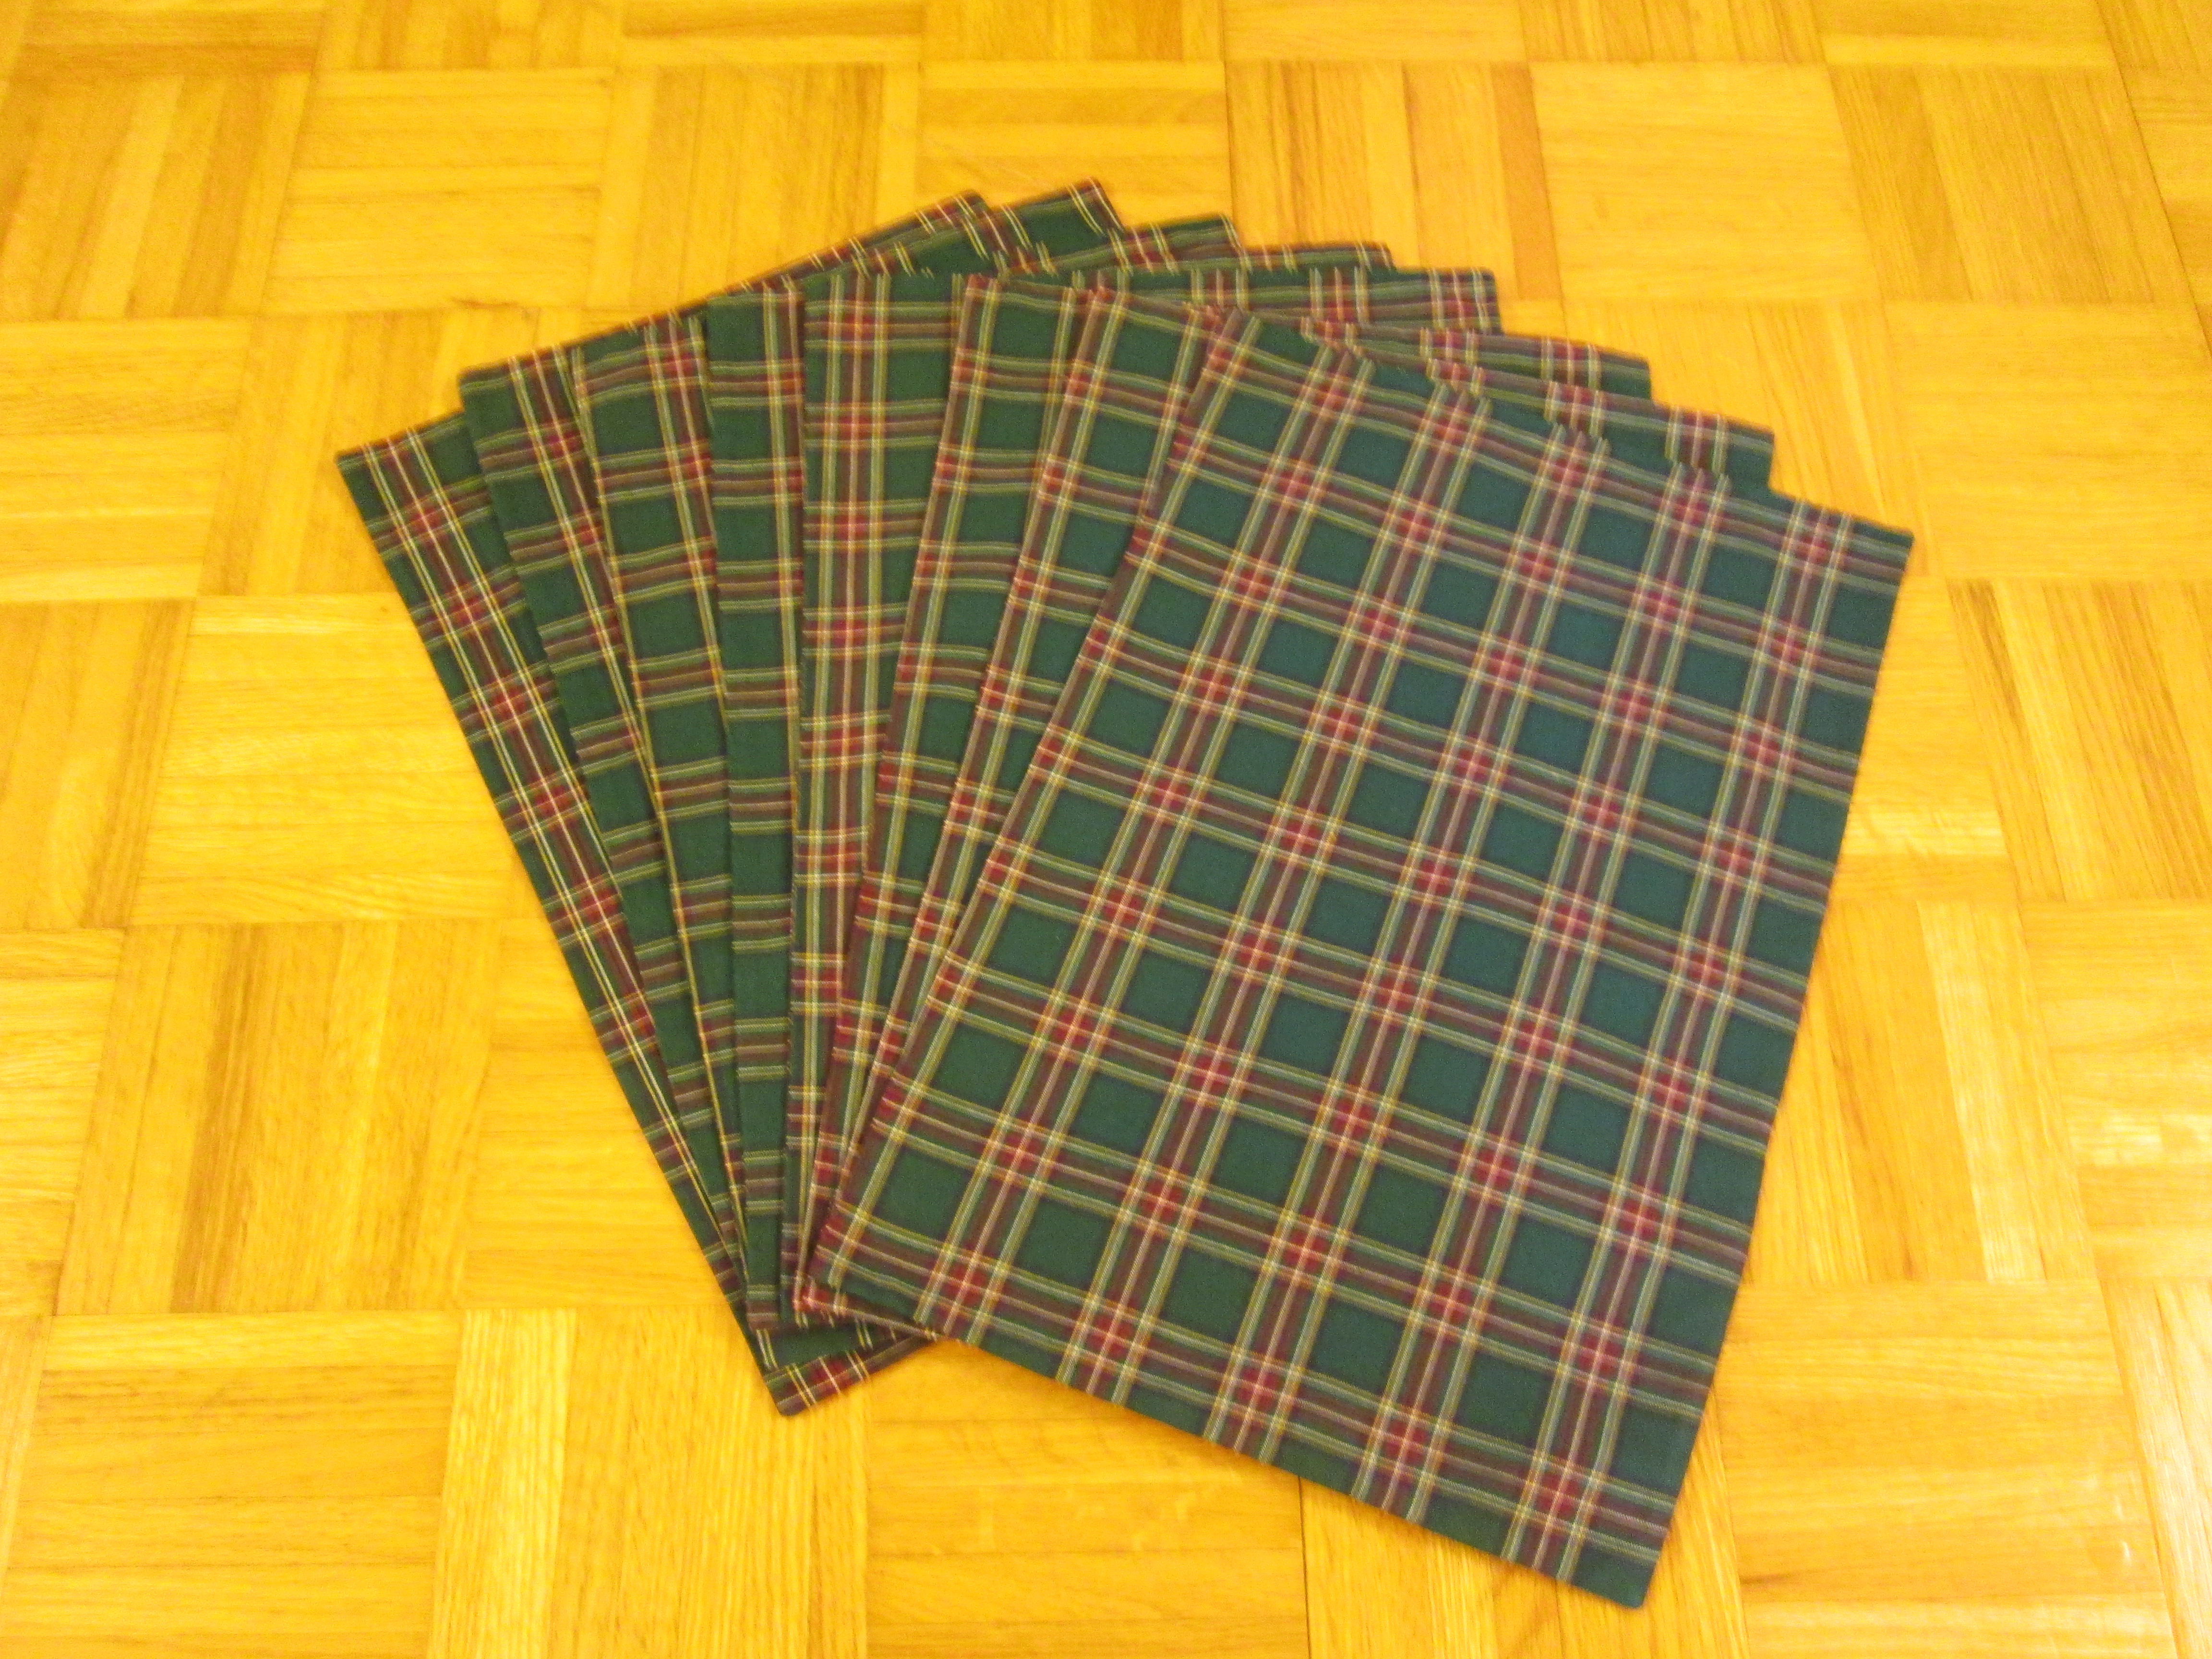
I made a set of eight tartan placemats and they turned out pretty well. They are 18.5" wide and 12.5" inches deep. I didn't get the cuts as straight or as centred as I would have liked, but they'll do.

Now it was time to make the skirt and waistcoat. But after I dragged my heels on that for awhile, I began to think it would be nice idea to make a set of napkins with tartan trim to go with the placemat, so why not forgo the waistcoat and do that?


The idea of the waistcoat vanished into the ether, and I made a set of nine 16" x 16" napkins to go with the eight placemats. There was enough of the white fabric to cut out a ninth napkin, so I made nine. Lindsie will have a spare if one gets stained or torn, and meanwhile she can use the extra to line a bread basket.   

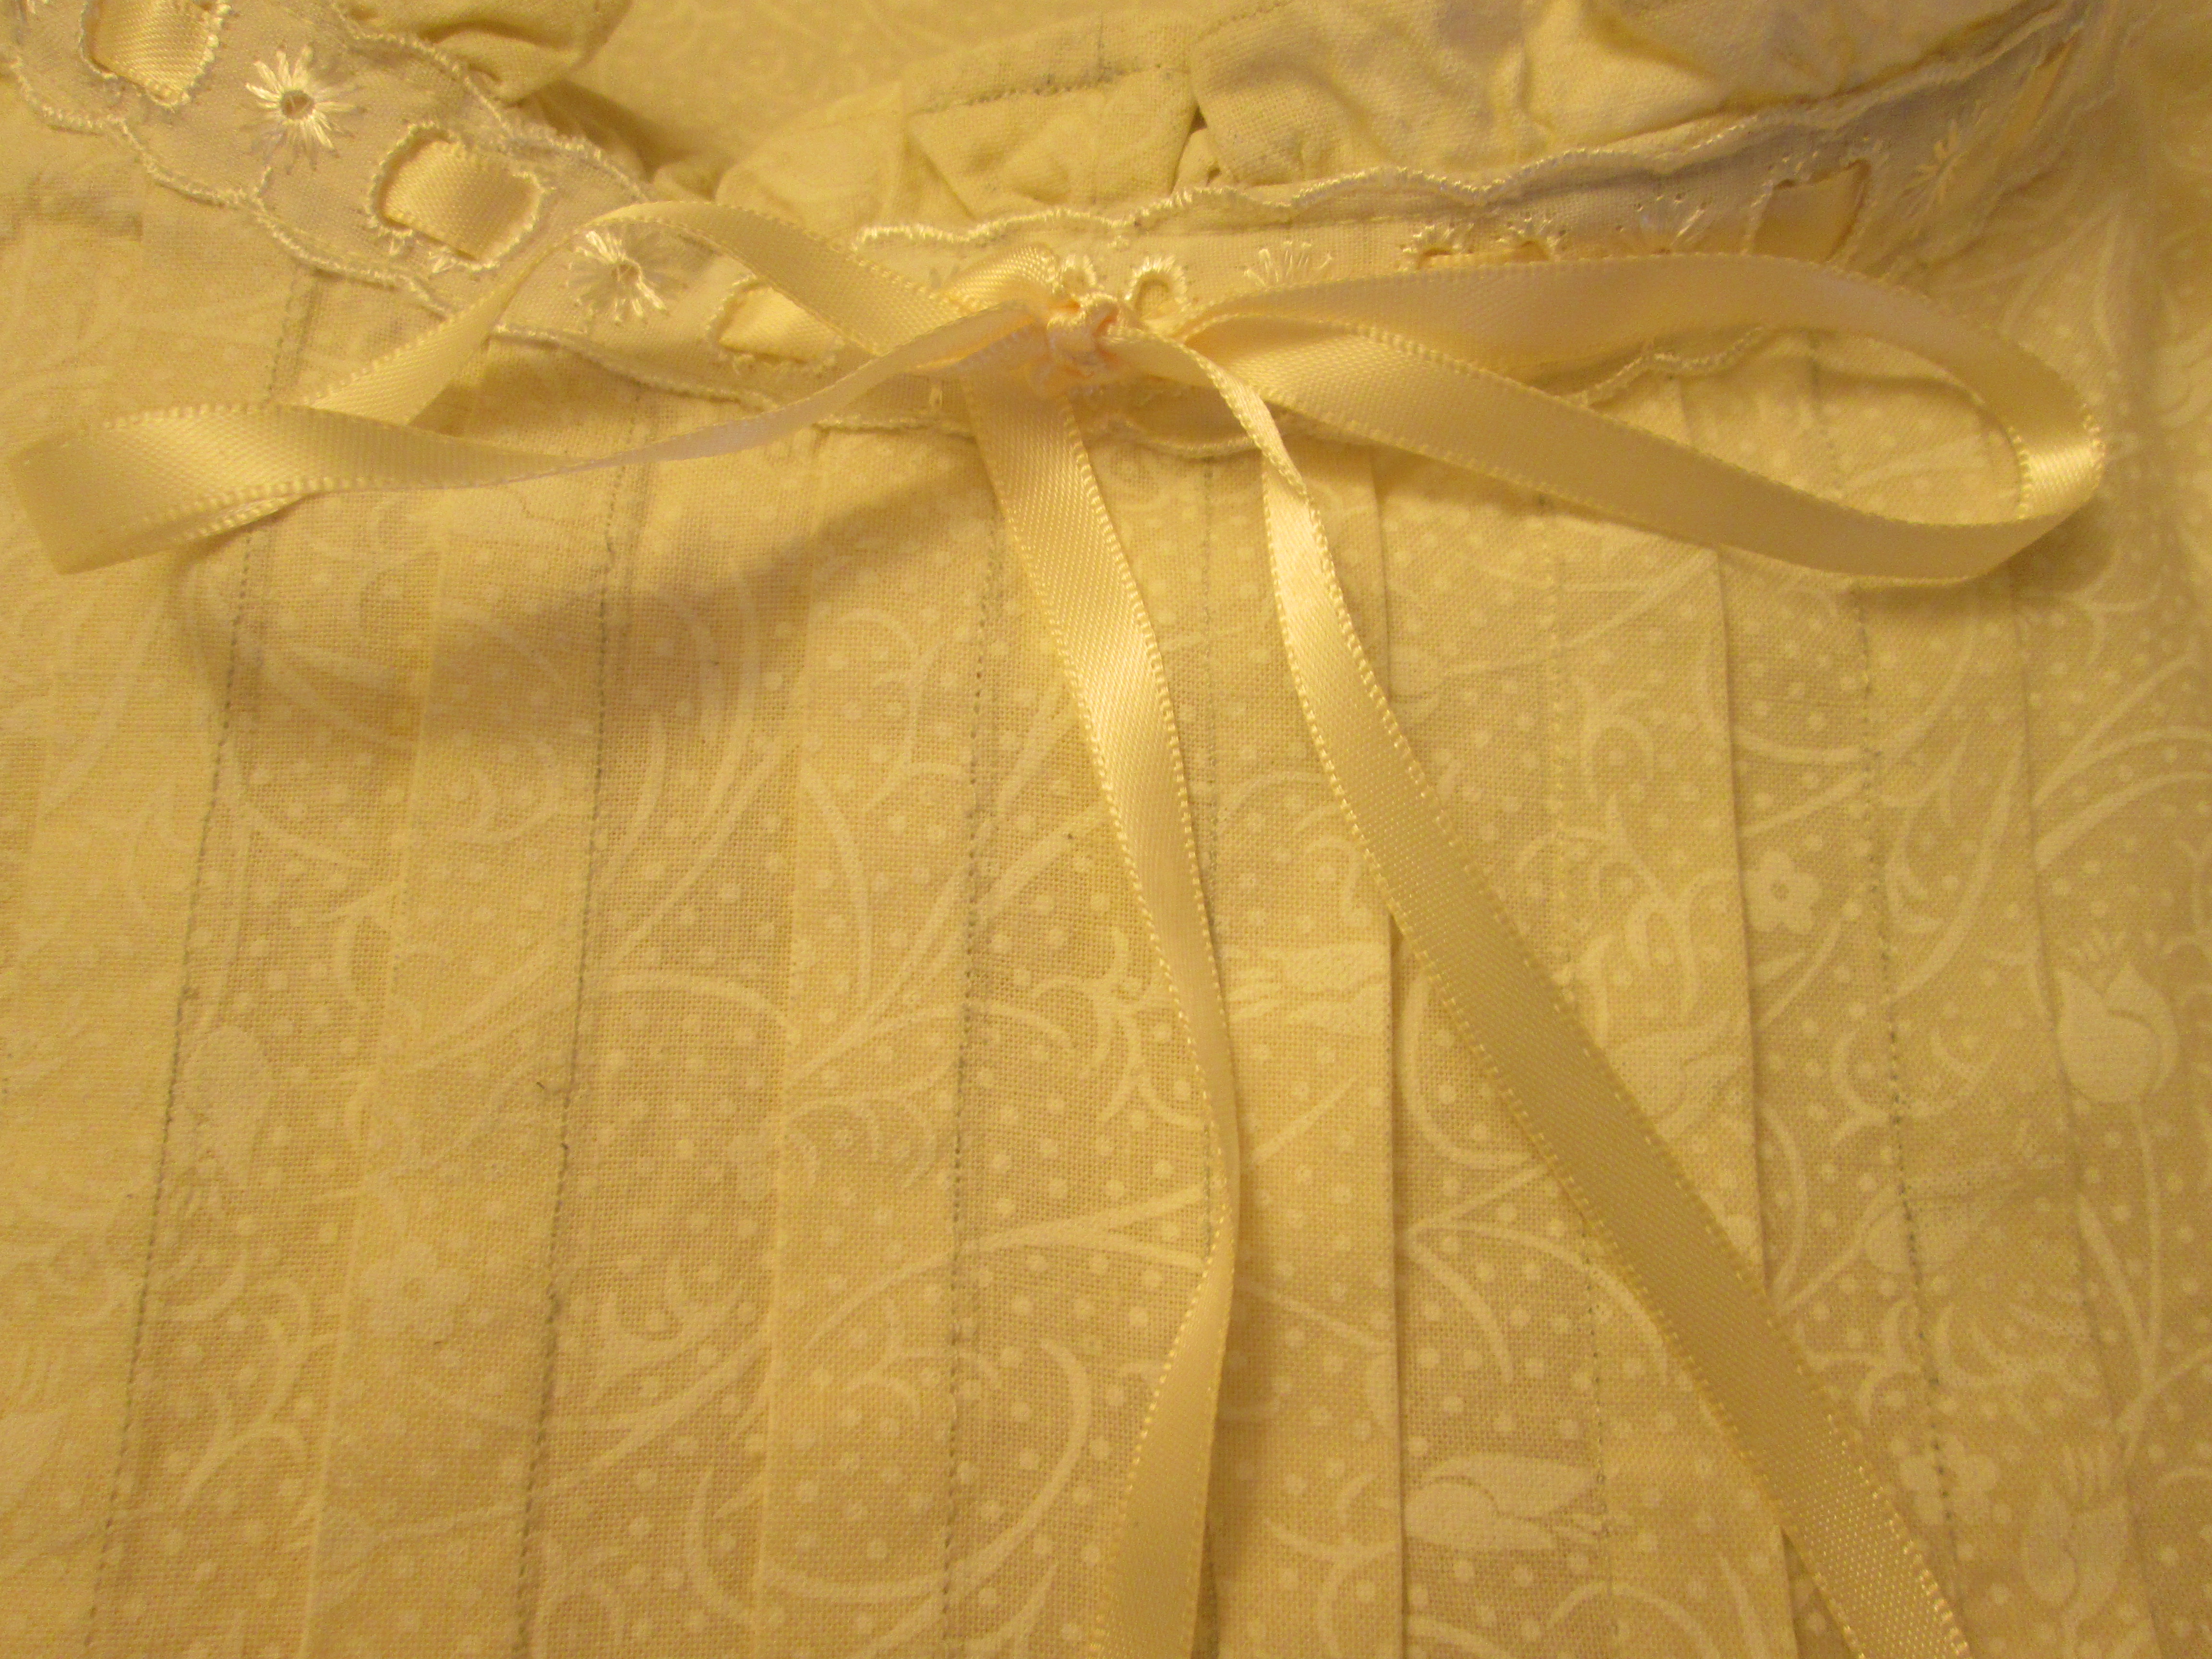
I wasn't that thrilled with this phase of the project. The tartan trim was so much stiffer than the napkin fabric that the resulting finished napkin felt a little unwieldy. My mother thinks the tartan will soften from repeated washings, which is something to hope for. I also underestimated how much time the trim would take to do. The machine sewing didn't take that long, but then I had to handstitch the tartan binding in place on one side, and it took well over two hours to stitch down the binding of a single napkin. When the end of December 2021 came and I only had two napkins done out of nine, I resolved to stitch one side of a napkin each day in January. I kept that resolution fairly well and had the remaining seven napkins finished by the end of January 2022. 

Once I'd made the tartan napkin bindings, there wasn't a lot of fabric left. I could no longer make a pleated skirt, but only a straight one. And I began to think about what I'd wear that skirt with, and how I would probably have to get a new sweater and shoes to wear with it.... and then I began to think about a table runner. 


And yes, the rest of the tartan fabric did in fact become a table runner. The finished item is 10.5" wide and just a smidge over 8.5' long. It's not one long piece of fabric as it should be, but I was able to piece the tartan in a fairly well matched way on one side, and Lindsie can always put a centrepiece or something over the seam if she wants to. 


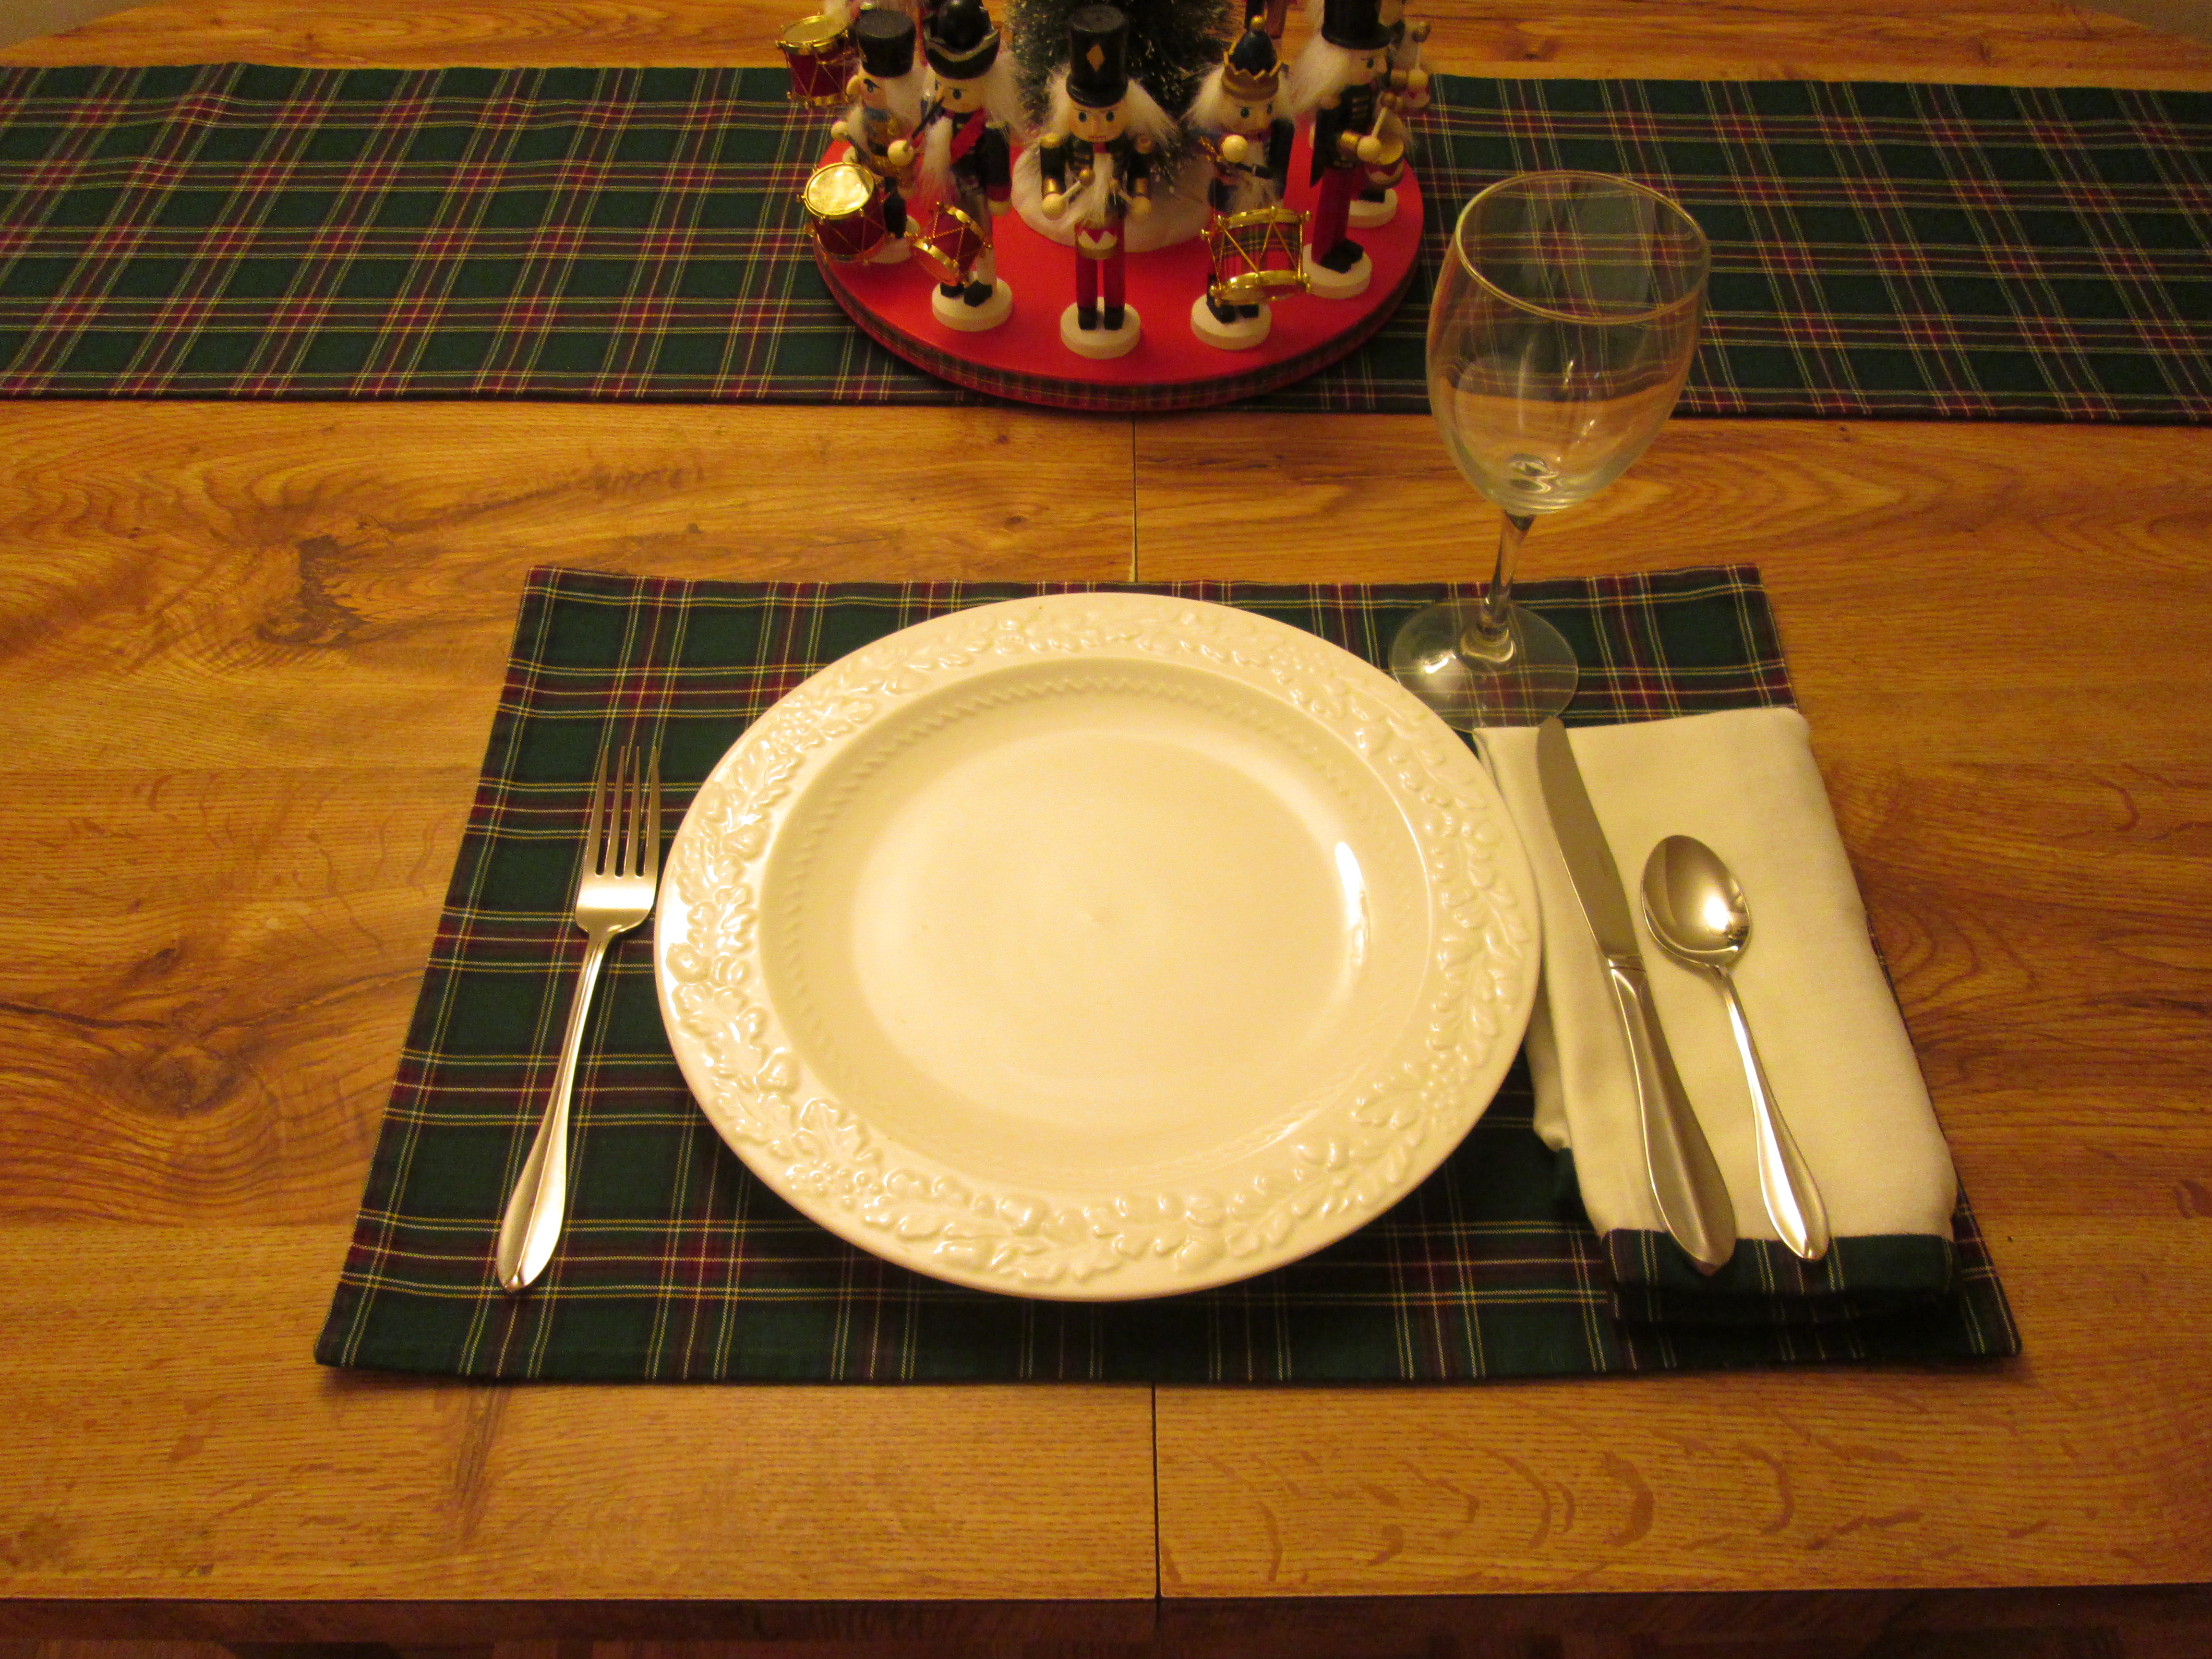
My photos of the napkins, placemats, and table runner on the floor were so unimpressive I decided to do a little staging. Here's how the table runner will look on a not too-large table with a centrepiece hiding that inconvenient seam. 


I put together a table setting, using my own tableware, to see how the placemat and table napkin would look in action. Not too bad. I do consider this table set flawed, but it presents well enough if one doesn't look too close. 

And what began as a gift I was making just to use up fabric has become my gift for Lindsie's 50th birthday. She and my friend Christine, who are my two closest friends, are both to reach the half-century mark in May 2022, and late last year I decided I would make them each a special gift for this milestone birthday -- something that they could use and enjoy for years -- and also have them both to Swan's End for a birthday lunch. The date of the lunch is yet to be determined as one of them can't make weekend plans right now due to some family stuff, but I'm looking forward to it. I haven't seen either of them since before the pandemic began, and as I've told them, it was so considerate of them to be born only nine days apart so that I would only have to prepare one birthday meal. 


In addition to the table set, Lindsie is also to get two tissue cases, a jar of my lavender jelly, and some cookies, which I'll bake once I know the date of the lunch. I think she'll feel appropriately celebrated.

As for Alanna, I think she's a bit miffed I didn't make myself that three-piece tartan suit, but she did approve of the table set, and at least her gift wasn't wasted -- I didn't throw out more than a handful of scraps of that tartan.