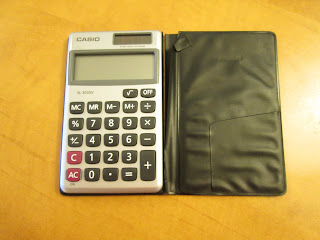
I bought the calculator you see above at the age of 22, circa 1995 or 1996, for something in the neighbourhood of ten or twelve dollars. Twenty-six years later, while the calculator was still in perfect shape and working order, its black plastic vinyl cover had become cracked and torn. I'd been meaning to make a new cover for it for awhile, but when in December 2021 I began to take my calculator with me to the grocery store every week and pre-total my groceries before checking out as a way to make sure I stayed under my grocery budget, I decided it was time to get moving on that project. I wanted my calculator to look nice if I was going to be taking it out in public, and the old cover was very close to falling completely apart.
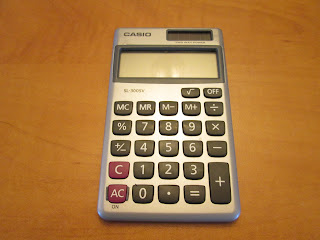
I did consider just using the calculator sans cover, but then I reflected that there was probably a reason that the calculator still looked perfect while the original cover was in such bad shape. Notice how the number pads are still clearly legible, and the screen is unscratched? No, the calculator needed protection from wear and tear, and must have a new cover.
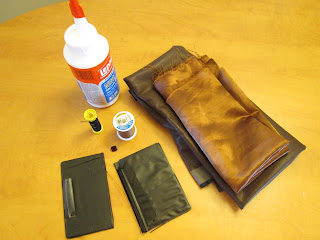
This wasn't a project I was going to find some handy tutorial online for -- I was going to have to figure it out on my own. I gathered some supplies: brown vinyl (left over from when I made
a handbag), lining fabric, coordinating thread for both fabrics, glue, thread elastic, a button from my button tin (it was one I had cut off a worn-out blouse I was throwing out), and the old cover, which I could employ as a pattern.
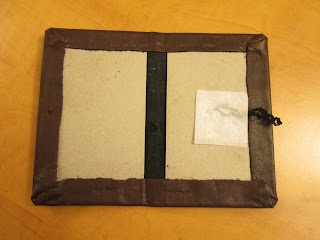
I laid the old cover on the fabrics and used it as a guideline to how big the new piece should be -- the pieces needed to be the size of the old cover plus a good margin that I'd be folding inwards. The piece of fabric you see in this photo was supposed to be the lining piece of the cover, but I ended up not using it for reasons that will soon be explained.
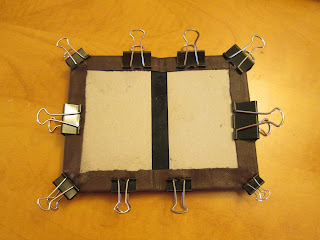
I cut the old black covers apart and pulled out the cardboard pieces that had given them their shape. Though I had planned to use the cardboard pieces as pattern pieces for new ones, they were in such pristine condition that I simply reused them for the new cover. Leaving room for the flexible spine of the cover, I placed the cardboard forms on the piece of vinyl I had cut, and folded in and glued the edges of the vinyl.
I used bulldog clips to secure the cover's inner edges until they could dry. One can't pin vinyl as it will leave holes, and it would be very difficult to pin it over cardboard anyway.
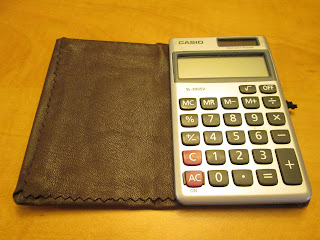
The old cover had no fastener, and had always annoyed me by constantly flapping open. And it had always seemed so awkward to me that the spine was on the right side -- it seemed to me it should be on the left, as with a book. I decided that my cover would be oriented to flip open like a book and would also close securely. I considered a tab with a snap fastener, but eventually decided a button and an elastic loop would be my best bet.
Vinyl doesn't hold hand stitching well -- the stitches just seem to tear out. I really should have affixed a square of interfacing to the underside of the cover piece before I glued it on to hold the button. Since I hadn't thought of that in time, I sewed the button in place by pushing my needle clear through the vinyl and the cardboard form and the vinyl on the other side and then back again, about twenty times. I had to use a thimble for this effort -- something I rarely do -- as it would have been too painful to push the needle through the cardboard with bare fingers.
I crocheted a chain from the black thread elastic in order to make the button loop. It took me a few tries to figure out how to attach the elastic loop to the cover. Sewing didn't work as my stitches just tore out of the vinyl, and I couldn't think of a practical way to glue something so small and finicky. In the end I cut two squares of interfacing and used them to create a sort of glue sandwich that I could use to secure the ends of the elastic loop. Once that had dried, I glued the back of the interfacing square to the cover, after first testing its position to be sure it was situated properly to fasten the button.
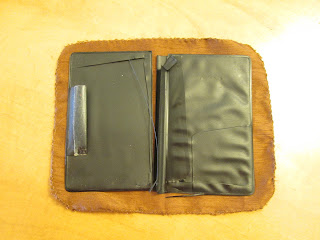
As indicated above, I'd originally planned to line the cover with a piece of satin lining. But when it proved so hard to stitch anything to the vinyl, and promised to be a time-consuming, pain in the ass, and very probably not at all successful job to sew the lining in, and I thought glue would seep through the satin lining and look bad, I opted to go for a vinyl lining. This was a much easier task, as I just had to cut a piece the right size and glue it in place. After I'd cut the piece of vinyl lining to the right size, I pinked the edges for a more finished look.
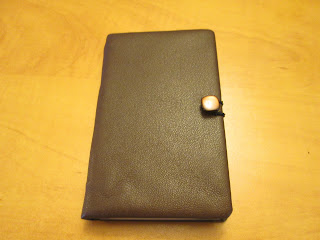
The finished project from the inside. The calculator is secured to the back flap of the cover by three strips of double-sided Scotch tape. I hope it holds, but if it doesn't, I will probably just try some stronger double-sided tape. In the old cover, the calculator was held in place by a strip of tape, and that held it in place for 26 years.
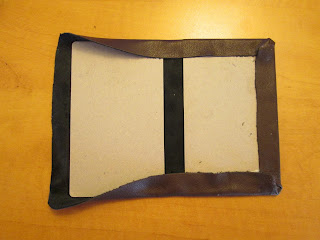
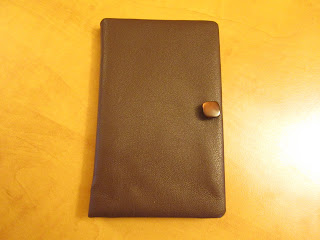
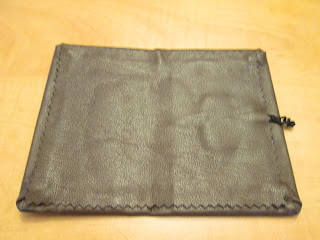
The finished calculator in all its buttoned glory. I'm pretty pleased with the result of my work on it. I don't know how long this cover will last -- I expect it to be less durable than the old one -- but now that I know exactly how to make a new one (and have documented the process, lest I forget), it'll be pretty easy for me to make another if necessary.
I certainly like this cover better than the old one, it will coordinate well with the daily wear, convertible bag I always take to the grocery store, and this is a project that didn't cost me a penny. Can't beat that.