Showing posts with label mending and making do. Show all posts

Thursday, May 4, 2023

Unplugged and Lying Down


Back in December 2006, when I bought Swan's End, a then 94-year-old house with a 1991 furnace in it, I found some of my very first purchases for the place were those which served to help keep me warm. I have never forgotten the first morning I woke up in my house because of how it felt when my bare foot touched the parquet floor beside my bed. (My unfortunate neighbours must have wondered if their new neighbour was part banshee.) Over the next month, I bought a warm bathrobe, slippers, eight pairs of wool work socks, a rug for beside my bed, and an electric blanket.  

Several years ago the electric blanket stopped working. I couldn't afford to replace it, but it didn't go on my "want" list of things I try to buy as I can because my furnace had been replaced in 2015 and I had made myself a Thinsulate quilt in 2020. I decided I could do without a new electric blanket, nice as it had been to get into a pre-warmed bed on a Canadian winter night. The electric blanket awaited its fate in my linen closet, its electrical cords and controls constantly entangling other items. Last month, when I was putting away some of my winter blankets, I took the electric blanket out of the linen closet. It was time to decide what to do with it.  

My first step was to do some internet research on whether it could be fixed. From what I gathered, while it might be possible to fix the controls, fixing the heating element within the blanket would be a much more difficult and expensive and perhaps not even viable proposition. I tested the blanket and concluded that the controls were working and the heating element was the problem, so I ruled out "fix the blanket" as an option. I hated the idea of just throwing the whole blanket in the garbage, so I began to wonder if I couldn't turn the electric blanket into an ordinary blanket, and use it that way. 

Ultimately, I did exactly that. And I thought I'd post about how I did it for anyone else who has, or who may in future have, a broken electric blanket and would appreciate a few tips on how to do the same. This project wasn't anything like as pretty or as aesthetically interesting as the kind of project I normally post about, but it is very much in the "mend and make do" spirit that is part of this blog's purpose to foster, so here goes.


I began my conversion project by unplugging the controls and setting them aside. Then I had to deal with the wiring inside the blanket. My electric blanket was composed of two layers of fleecy fabric, and there were narrow, vertical channels stitched into the interior. The electric cords ran through those channels, looping from channel to channel at the top and bottom of the blanket, much as the red lines I have drawn on the photo above do, only much less wonkily.:) Originally I expected I'd be ripping out the interior stitching to get the electrical cords out, but I soon realized there was a much easier, faster way to do it.

I opened the stitching on the bottom of the blanket to access to the blanket's interior, and cut the loops between the channels (indicated on the photo by the blue arrows at the bottom of the photo). Then I opened the stitching at the top of the blanket and pulled on each loop (indicated by the black arrows at the top of the photo) until that length of wire came out of the blanket. 


I removed the heating element too (it was near the bottom). Then, once all the electrical components were out of the blanket, I first stitched together the little slit where the heating element had been (it's visible roughly in the centre of the above photo), and then restitched the top and bottom of the blanket. I did the sewing on my sewing machine, using the various stitch options to mimic the style of the original stitching (but one could also do the sewing by hand if necessary). Had I known exactly what I was doing from the start, the entire job would have taken under an hour. Once the blanket was all stitched back together again, I ran it through the wash. 

As you can see from the  photo at the top of this post, I now have a fleecy blanket in very decent condition that will be usable for years to come, and only its former wires and controls will wind up in a landfill. 

Monday, December 7, 2020

Makeup Case Makeover Madness


In January 2020, using the tartan canopy from an old and broken umbrella, I relined the the wicker case that I use to hold my manicure kit, and made two matching vanity cases to boot. I was so pleased with how that project had turned out and enjoyed using my upgraded manicure kit so much that I soon turned my sights to my makeup case, which you see in the photo above. I bought this case in an after-Christmas sale at Shopper's Drug Mart for $16 in 2012. It came with makeup in it, all of which I gave away unused to my sister/a friend because none of it was the right shade for me, but I didn't care. The case alone was worth the $16. It's a good-looking case that is just the right size to hold all the makeup and equipment I could reasonably want, it fits nicely into my top dresser drawer, and it isn't too big to pack into my suitcase when I travel.  

But, after eight years, it had become somewhat the worse for the wear. To begin with, the faux chrome trim was coming off on the outside on the left side. 


The lining of the case's interior had become stained and yucky over the years. But, since my manicure kit refresh had turned out so well, I was confident I could fix that. Regrettably, after that tote bag and manicure kit and tissue case upcyling extravaganza last winter, I was fresh out of broken umbrellas that could be used for lining, but it's not like I'm allergic to fabric stores. I took the makeup case with me when fabric shopping to make sure I got a fabric that would go with the brown of the shell, and ultimately bought half a metre of a dark brown nylon lining fabric at Len's Mill on Orfus Road, Toronto, for $4.33. I also bought a brown 7" zipper with the idea that it would be nice to have a matching vanity case to go with the case and help me organize it. 


The makeup case with its new lining. If you've got an old beauty case you'd like to reline, I say go for it. It's not a difficult task, though it does take some time, as it's finicky work getting everything positioned and glued just so, and one needs to do it in stages to give the glue time to dry. It's also inexpensive, as you just need a modest amount of nylon fabric, glue, and possibly some cardboard.

After getting the old lining pieces ripped out, I cleaned the case. There was dried old glue on the trim that I had to scrape and scour off, and I had to use a razor blade to scrape some of the old glue out of the interior. Once the case was clean and empty, I reglued the part of the trim that had been coming off on the exterior, and left it to dry.

I then ripped all the old lining off the cardboard forms, and recovered the old forms with the new lining. I reused all the old cardboard pieces for my lining, with the exception of the upper lid piece, which had a window cut in it for the mirror. (I chose not to put the mirror back in, as I've never used it and it's just something else to keep clean.) I had piece of scrap cardboard on hand that I used to make a new upper lid form. I gave the lining pieces a day to dry, and glued the lining back in stages, one stage per day: first the top and bottom side lining pieces, then the back wall/hinging piece, then finally the big top and bottom pieces.


When I looked at how my makeup case was organized, and figured out what kind of custom cases would help me to keep my makeup tidy and accessible, I wound up deciding to make *three* matching cases for the kit. Using the leftover dark brown nylon and some remnant lighter brown satin lining fabric I had on hand, I made a tissue case, I made the vanity case I'd planned to make, and when I found I had a second 7" brown zipper in my zipper box (bought to use in a skirt for a brown suit I'm planning on making, but I won't get to that project for months and will have time to replace it), I made a third case to hold my makeup mirror, which will hopefully protect it from getting scratched and/or dirty.


The finished and (mostly) packed case. The plastic case that you see in the box holds my makeup brushes, a ziploc bag of cosmetic sponges, and a bottle of makeup brush cleaner. In the front of the case on the left are my mascaras, eye crayon, and concealer. In the right front corner are my bottles of foundation. On the right side are my blush, contouring, and two eyeshadow compacts. The vanity case I made holds my lipsticks and lip glosses. 

I'm nearly as pleased with this project as I was with the manicure case refresh. For less than $6, I have made this makeup case better than "good as new" -- it has never looked this nice or been this conveniently arranged. All my makeup and tools are reasonably easy to see and access. When I put the lipstick case, the mirror case, and the tissue case on top of everything else and shut the lid, the makeup kit is packed snugly enough that nothing shifts around much inside and it's all in the same order when I open the lid -- unless I have a dimbulb moment and open the case upside down, that is. (Yes, it's happened. And yes, it's happened more than once.)

And now I'm inspired to get out the thrift shop makeup books I bought recently and begin working on upgrading my fairly basic makeup skills. A woman who owns a makeup kit this nice ought to be able to put her makeup where her mouth is. (Or eyes or cheekbones or whatever.)  

Friday, February 21, 2020

A Tale of Three Umbrellas


This crafting project began when I cleaned out my hall closet late last fall.


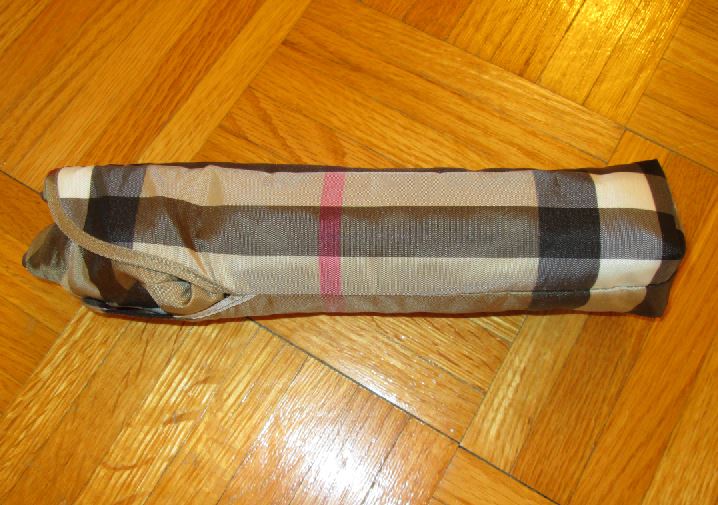
While cleaning out the closet, I came across two broken umbrellas. The compact that you see in the picture above is a Burberry umbrella that I bought via eBay years ago. It had a very frail structure that didn't last very long -- perhaps two or three outings. The walking umbrella below the compact is not a genuine Burberry, but one of the imitations one used to be able to buy in the early 2000s, before Burberry (understandably) began cracking down on the use of unauthorized/imitations of their trademark tartan. That walking umbrella stood me in good stead on rainy days for years, but eventually broke. It's impossible to find a Burberry-esque tartan umbrella now, and I can't afford even a secondhand Burberry umbrella these days, so I hated to just throw these umbrellas out. First I looked into the possibility of repairing the umbrellas... or rather the impossibility of repairing them. Then I turned to the idea of buying a new umbrella of the same size and stitching the old canopy on it, but though I kept an eye out for suitable new umbrellas for some years, I was never able to find umbrellas of the same dimensions, and had given up on that idea. I was tired of having a couple of unusable old umbrellas sitting around taking up space in my tidy closet, so I decided it was at least time to get them out of there.

I then ripped the canopies off the broken frames, threw the frames out, and ran the canopies through the wash. This redefined my challenge completely: now I had two fairly sizable pieces of no-fray, durable, waterproof, nylon fabric in an attractive tartan sitting on my sewing table. What might I do with them?

I very quickly decided I would make a tote bag out of the compact's canopy, because it would make a perfect stocking stuffer-type present for my sister who, judging from some of her pins on Pinterest, likes Burberry tartan just as much as me. I found a tutorial for a reversible lined tote bag on the net, and wondered what I could use for the lining. My sister likes black, so I thought some black nylon would work. I considered buying some. But before I could do that, I found a broken walking umbrella abandoned just outside the grocery store one day when it had been raining on and off and I was making a quick trip to the store to buy kitty litter during one of the non-rainy intervals. On my way back home, I picked it up and tucked it under one arm and carried it back to my house (along with a jug of kitty litter in each hand). I probably looked like a crazy person, but there was method in my madness. Once home, I ripped the black umbrella's canopy off its frame, threw out the frame, and ran the third canopy through the wash as well.


Cutting out the bag pieces proved a bit of a challenge. The compact-sized canopy just wasn't that big. I couldn't seem to find a way to lay out the half-size pattern piece twice on a fold the way the directions called for. In the end what I did was cut out the black lining pieces first and prepare two half-size paper pattern pieces. Then I pinned one of the black lining pieces flat on the canopy in order to use it as one full pattern, and then pinned the half-size pattern pieces on each side and chalked a 1/2" seam allowance for each. There was very little wiggle room for tartan-matching, but I managed to do pretty well on that score anyway. Just for the heck of it, I also ripped out the little Burberry tag that had been on one of the umbrella canopy seams. Then it was time to sew the pieces together.


The finished bag. I think it turned out pretty well, and even has a certain style to it.


The front and back of the tote bag. The pieced side doesn't look so bad. I thought seaming the two halves together made for a rather interesting effect.


The bag as it looks "inside out". My sister will have the option of using whatever look works best with her current outfit.


I sewed the original Burberry tag into the seam high on one side of the bag, then stitched the other three sides of the tag down (it wasn't a reversible tag). I thought it made for a nice finishing touch.


And for a final finishing touch, I rolled up the bag and stuck it in the original umbrella case. Having a little storage case for the tote bag will make it easy for my sister to keep the tote in her handbag for times of need.

So much for most of the compact umbrella canopy, and some of the black umbrella canopy. Now, what was I to do with the tartan canopy from the walking umbrella?


I toyed with the idea of making another tote bag for me, but I didn't much like the idea, given that I have a set of six tote bags already and don't need or want any more. Then one day an idea came to me. I've had the little case you see depicted above for over ten years, and use it to hold my manicure kit. It sits on a glass shelf in my bathroom, and looks nice there, but the lining had become stained. I was looking ruefully at it one Sunday morning as I was giving myself my usual weekly manicure, and thinking how bad it looked, and then it occurred to me that perhaps I could fix it by relining the manicure case. I looked closely at the lining and it seemed to me that it would be quite possible to replace it. Then I wondered what kind of fabric I would use to reline it, and it dawned on me that I had the perfect fabric on hand: a fabric I'd been looking for a way to use, that was waterproof nylon and could very likely be wiped clean in case of spills, and that would look really nice as a lining for that particular case. Who could ask for more?


The first step was to rip out the old lining. It was just fabric, cardboard, and glue. I kept all the pieces to use as patterns for the new lining inserts. The ribbons that hold the lid were still clean and in excellent condition, so I didn't remove them. While I had the case stripped down, I did some restorative gluing of some of the outer parts of the case that were coming loose.

I dug through my art supply cupboard and found some pieces of light cardboard I'd tucked away to use sometime -- things like inserts from a package of stockings, or remnants of poster board from some project. I did wind up reusing the strip of cardboard that lines the curved front side of the box, as I didn't have any cardboard of the size and flexibility to replace it. I always keep a bottle of glue on hand.


And here's the case with its new tartan lining.

The task of relining the case was pretty straightforward: I'd trace around the old piece of lining on one of my pieces of cardboard, cut the new piece of cardboard to match the old, cover the new lining piece with a piece of tartan nylon cut from the umbrella canopy using glue, and then glue the new lining piece in place in the reverse of the order that I'd stripped them out: first the bottom piece, then the curved side piece, then the back, then the lid piece. I elected not to put the mirror back in, as I don't need a mirror for manicures and pedicures. I'm really pleased with the new look.

But I did have quite a bit of that tartan walking umbrella canopy left, so....


I also made two new vanity cases out of the remaining tartan, and lined them with a white nylon lining fabric I had leftover from some project I made many years ago. One holds my emery boards, and the other holds my cotton balls and cotton swabs. I am as pleased with this manicure kit project as I was with the tote bag. I haven't just relined my manicure case -- I've upgraded it, and my only expense was two new zippers, purchased from Fabricland using a 50% off coupon.

But I still wasn't done.


I had been thinking for awhile that I must make myself some kind of tissue case to put in my backpack/shoulder bags/handbags, as I hated the way the tissues I carry around for any time of need get so rumpled and ripped and grubby before they're even used. I did a little googling and reading up on how to make tissue cases, and found that they're super easy to make. While I was planning to make a few for myself, I thought I might also make a few out of the umbrella canopies, if I had enough canopy left once I was done with the tote bag and manicure case projects. Again, umbrella fabric is waterproof, and should be ideal for keeping tissues clean and dry.

I did indeed have a little umbrella fabric left, so I whipped up the tissue cases you see above. (I used this tissue case tutorial, and then this tutorial on how to inter-fold the tissues.) The Burberry tartan tissue case (top left) is lined with more of the black walking umbrella canopy, and I shall give it to my sister when I give her tote. The other tartan tissue case (bottom left) is lined with another piece of the white nylon lining I used for the vanity cases, and I'm going to give that tissue case to my mother. Then I made two more tissue cases for me, the first (bottom right) from a remnant of jacquard decor fabric I had used for lining a handbag in 2018, and the second (top right) from remnants of brown vinyl and coppery brown satin lining I used to make a handbag in 2017, so I have tissue cases to match two of my handbags.

I think the Burberry tartan case is the nicest case of the four. The brown vinyl one is the one I am most dissatisfied with. I couldn't press the vinyl properly as the heat from the iron would have ruined it, and because of that, the top edges didn't come out even. This is a project that requires a fabric that irons into crisp folds. Oh well, it'll certainly do for now.

And that was the tale of three broken umbrellas, and how I used them to make three separate small presents, and to upgrade my manicure kit. Now the next time I see some poor, broken umbrella lying abandoned by the sidewalk in the rain, I may have to resist the urge to bring it home and show it some love.

Friday, October 12, 2018

Skirting the Unsatisfactory Dress Issue


Earlier this year I took a unusable dress out of my wardrobe and turned it into a skirt, and I began thinking about how it was the fourth time I had done such a thing, and that perhaps I should write a blog post about the process. And here we are.

The fabric above belongs to a dress I used to have that I must have made circa 2005 or so. I loved the fabric on sight and still love it.


Here's a shot of the dress as it was. Not only did I love this dress, but it had history. In its day, this dress went to an Elvis wedding in Las Vegas in 2006, and to Raleigh, North Carolina in 2008, and to the office, and to parties, and probably a number of other places I'm not thinking of now. But... by 2016 the style had become dated and too young for me and I no longer cared to wear it as was. Yet I couldn't bear to give it to a thrift shop. So I came up with the idea of cutting it down into a skirt in order to get some more wear out of it.


Here's the skirt, which passes for current, and which I will likely be able to wear until it's worn out. Turning a jersey dress into a jersey skirt takes very little time or skill. Figure out where you want the waistband of the skirt to be, mark the spot, cut the bodice off 1" or so above that, make a casing out of that extra 1", insert a piece of 0.5" wide elastic into the casing, and you're done.


Here's another former jersey dress now living a new life as a skirt. In this case, the dress was nice (I don't seem to have a picture of it anywhere), but the wrong cut for me. I don't know why it took me so long to figure out that I do NOT look good in an empire-waisted dress. I remember cutting both of these dresses down into skirts on the same day. I think it took half of an afternoon.


Here's another dress that was unsatisfactory as was. I made it years ago before I clued in that I need to lengthen the bodice of my dresses to provide vertical room for my chest. I loved this dress and the lovely crisp fabric it was made from, but the waistline sat well above my actual waistline and looked terrible, and consequently the dress was basically unwearable for me. In short, it was another candidate for skirt surgery.


The dress above reincarnated into a skirt. This is a woven fabric rather than a jersey, which made the conversion process slightly more complex. First I ripped the bodice off the dress. When I came to the zipper at the back, I first made sure the zipper tab was at the bottom of the zipper and then simply cut through the zipper. Then I searched through my pattern collection to find a particular favourite skirt pattern that I know fits me well, and borrowed the waist facing pattern pieces from it. I compared the facing pattern pieces to the top of the skirt, and found it was a little wide, so I ripped open the side seams, cut them slightly to taper them in so that they would accord with the pattern pieces, and then stitched the seams back together.

Then I cut the facing pieces out of the bodice. I had to cut them lengthwise, against the grain, but that didn't matter in any practical sense -- they're only facings after all. I interfaced the facing pieces and otherwise prepared them just as I would if I were making a skirt from that pattern, and stitched them into the waist of the skirt. The shortened zipper ends of the former dress-length zipper were stitched into the "waist and facing" seam at the top so I had a skirt-length zipper without having the work or the expense of putting in a new one. And then I had a skirt that looked exactly as though it had been intended to be a skirt all along.


And here's a fourth skirt that was originally intended to be an empire-waisted dress. In this case, it was a dress I never even finished as I realized that it wasn't going to fit or look right. It had been a fairly expensive dress by my standards and once I faced up to the reality that there was no possible way for me to make my original plan for a georgette dress work, I decided it was better to have a pricey skirt than expensive garbage. Just as in the case of the dress above, I made some waist facings out of the bodice (in this case I think I made my own waist facing pattern pieces out of paper by tracing around the top of the skirt pieces), and sewed them in. I think I had to piece the facing pieces on the inside because I just couldn't get both facing pieces out of the bodice pieces, but then no one but me will ever see that.

If you've got a dress that's unwearable for some reason but the skirt part of it fits and is in good shape, I'd suggest cutting it down into a skirt. As you can see from this post, it can be done without more expense than that involved in buying some elastic or interfacing and thread, and in such a way that no one will ever know that the skirt was ever a dress.

Unless you decide to write a blog post about it and effectively tell the whole world, of course.

Thursday, October 11, 2018

All That Glitters is Not Gold


For a number of years I've had these brooches sitting in my jewelry box, unworn. I had bought them myself over the internet, and they didn't look as pleasing in reality as they had in their vendors advertisement photos. Eventually I decided that I would like them better if they didn't have that cheesy-looking bright faux gold finish, and wondered if it would be possible for me to paint them. I googled the matter, and what I found reassured me that it was indeed possible.


The first step was to take the cameo brooch and the faux stone brooch apart. That proved surprisingly easy; a little careful pressure and they popped right out.


Then I painted the brooch, using a small, fine paint brush and dollar store silver craft paint for the swan brooch and bronze craft paint for the other two brooches. I think I did two coats on each brooch. Then, once it had dried, I glued the cameo and faux stone back in place. The result was more or less satisfying. I wasn't able to quite kill the gold look of the cameo or faux stone brooch, but I did tone it down considerably. They look less obviously cheap.


I rather liked the silver paint on the swan brooch. The original tone shows through a little, with a highlight effect.