Wednesday, October 28, 2020

Where Two Tartans Meet


In 2015, I bought 1.9 metres of the tartan fabric you see above for under $10 with the idea that it would be used to make a dress for me. In 2017, I used a little of it to make a pincushion for a friend. In August 2020, I used some of it to accent a dress and purse for my grandniece Cauliflower, cutting out the pieces for my dress first to make sure I would have what I needed for it, and could feel free to use what was left for Cauliflower's dress. Then, once I'd finished the dress for Cauliflower, it was time to turn back to the pieces I'd cut out for my dress. I had a certain dread of making it, remembering what it was like to make a tartan skirt from a very similar fabric years before.


This is the pattern I picked out for the dress: Vogue 8873. It's a 2013 pattern that is no longer available on the Vogue Pattern website. I love it -- it's a wearable, practical, yet stylish design that can work as either a day dress or for something more dressy, depending on the fabric chosen. It's flattering too.  When I searched for an image of the cover to use in this post, my search pulled up many a dressmaker's version of it, nearly all of which looked lovely on the wearer. And it even has pockets, which makes it practically a unicorn among dress patterns. 

But... it was probably not the ideal choice for this tartan fabric. I keep side-eyeing the sketch of view F (see bottom right of the pattern photo above) done in a tartan fabric, which shows the dress in a tartan fabric and the bodice overlay with the same tartan orientation as the skirt. Be warned: that sketch is a liar and a deceiver. The draped bodice overlay section is cut on the bias, while the skirt piece is cut straight along the grain. I had two fears as I made this dress: that I would accidentally cut one piece of it beyond repair (I had no fabric left to recut even the smallest pieces); and that it would look like a discordant mess when I was done (I hadn't had much leeway for pattern matching). 


Here's the finished dress. Yes, the tartan of the skirt and of the bodice are wildly at variance, but I am inclined to think that this fun contemporary tartan doesn't require the kind of fabric matching that a more traditional tartan does and that it looks fine. But I may be totally deluding myself.  

The fabric itself has a very sturdy quality to it and it should wear like iron. The style is not likely to ever date, or to become too young for me. I'll definitely be keeping the pattern for future use. 


I can't resist doing a little show and tell on how I'm going to style the dress. Some years back I scored the handbag you see above at my neighbourhood Salvation Army thrift shop for $8, and the suede pumps that sit beside them at a Le Château outlet store on Toronto's Orfus Road for $33. I spent perhaps $50 on the dress (the fabric was super inexpensive, but I had to buy the pattern, a zipper, and I splurged on a good quality lining), so the total cost of the outfit is under $100. The colour didn't photograph well, but the handbag and shoes are a rich teal, not the more turquoise-like colour you see here, and the two are an excellent match, with barely a few shades' difference between the two. As for jewelry, I think I'll go with some simple silver pieces, such as the sterling silver rose pendant necklace I wear a lot. 


Still not decided about that tartan mishmash -- will I be making every dressmaker who sees me in it cringe? -- but I'm very happy with the total outfit. I also managed to get a dress, contrast fabric for a second dress and a purse, and a pincushion out of less than 2 metres of fabric that I paid under $10 for, so I'm happy about that too. 


Wednesday, October 21, 2020

New Jewelry and a New Neck


In August 2020 I made a navy dress with tartan accent cuffs and hem border for my grandniece's 11th birthday. Once it was done I regretted that I hadn't made her a necklace to go with it, and wound up resolving to make her one for Christmas.

My first step was to look in my bead box to see if I had any beads that would go with the dress. I didn't have any beads the right colour, but I did have some silver beads I thought would be useful. I took some of the tartan and navy fabrics to Michaels to get a few strings of beads in coordinating colours. It wasn't easy to match it -- the red of the tartan is an off-beat shade -- and I wasn't excited about what I eventually found, but I did purchase two strings of red beads and one of turquoise that I thought would do. Michaels was having a 40% off sale on all their stringed beads, so that was a help. 

On the same trip, I scored an 18" jewelry neck for 50% off, which was much more satisfying. I'd been wanting one for several years. It will help me make an especially elaborate necklace I have in the works (I'll need to be sure the multi-strands sit properly), and will also be a nice-to-have when it comes to displaying whatever jewelry I make for photographing.   


Here's the necklace... and a pair of matching earrings I whipped up... and the jewelry neck. I'm very meh on the necklace. It's presentable and will go with my grandniece's dress, but it's nothing special. I wish I'd been able to find more interesting beads in the right shade. 

The jewelry neck does elevate it though. Doesn't the necklace look so much better on it than it would lying on a bare surface?


I no longer have the dress, but I did a kind of mock-up by laying a swath of the navy fabric over a piece of the tartan to get a sense of how the necklace will look over it. It goes. 


A close up of the earrings. They're not so bad. I'm still much happier about my new jewelry neck than I am about my handiwork. 

Tuesday, September 8, 2020

The Pandemic Quilt


Some of my project plans originate in my having some supplies sitting around that I want to use up, and some come into being because I need a particular item. In this case it was a matter of both, which is the ideal scenario.

Back in 2012, I came up with a hare-brained plan to make a long velvet coat, and I bought the pattern, the velvet, the lining, the Thinsulate interlining, and even the thread and buttons for it. Then I put off actually making the project for years as I came to the slow realization that it wasn't a good idea, that the coat wasn't going to be warm, that the velvet was too fragile for outerwear, and that I would have very few occasions to wear such a coat. I bought more supplies and made myself a far more serviceable long tweed coat. But that ill-advised velvet coat plan left me with a lot of supplies to use up in some other way. I've made a long skirt out of the beautiful printed velvet and have specific plans to make a few more velvet items (I'll be posting about them all in a single post once they are done), I'll eventually use the buttons and lining for something, but what to do with the Thinsulate was a knottier problem. There was so very much of it -- besides what I'd bought for the coat, I also had quite a bit left from another project I made years before. I'd have to make a number of coats or puffy vests or whatever in order to use it all up, which would be expensive, and what would I do with them once they were done? I didn't need them, and none of the family members and close friends with whom I exchange gifts did either. I faced a future of making puffy vests for everyone I knew, and I didn't like the prospect at all. 

It wasn't until the fall of 2019 that I had a eureka moment. I'd recently cleaned out the blanket box in the attic and been reminded again that I had so much Thinsulate to use up. Just a few days later, when I was vacuuming around the the blanket box and thinking ruefully again about all that Thinsulate folded away inside it, I finally hit upon one of those solutions that seem so obvious in retrospect: I really needed another warm blanket for my bed, and I could use the Thinsulate to make a quilted blanket.

My first step in this plan was to get out the Thinsulate and lay it out and make sure that I had enough for a quilted blanket big enough to fit my queen-sized bed. And I did indeed. After I'd cut and pieced the lengths I wanted for my quilted blanket, I had enough left over to make a 4' x 6' throw-sized quilted blanket, which would make a nice gift for someone, and I tucked away the rest of the Thinsulate, happy to finally have a plan for it all. 

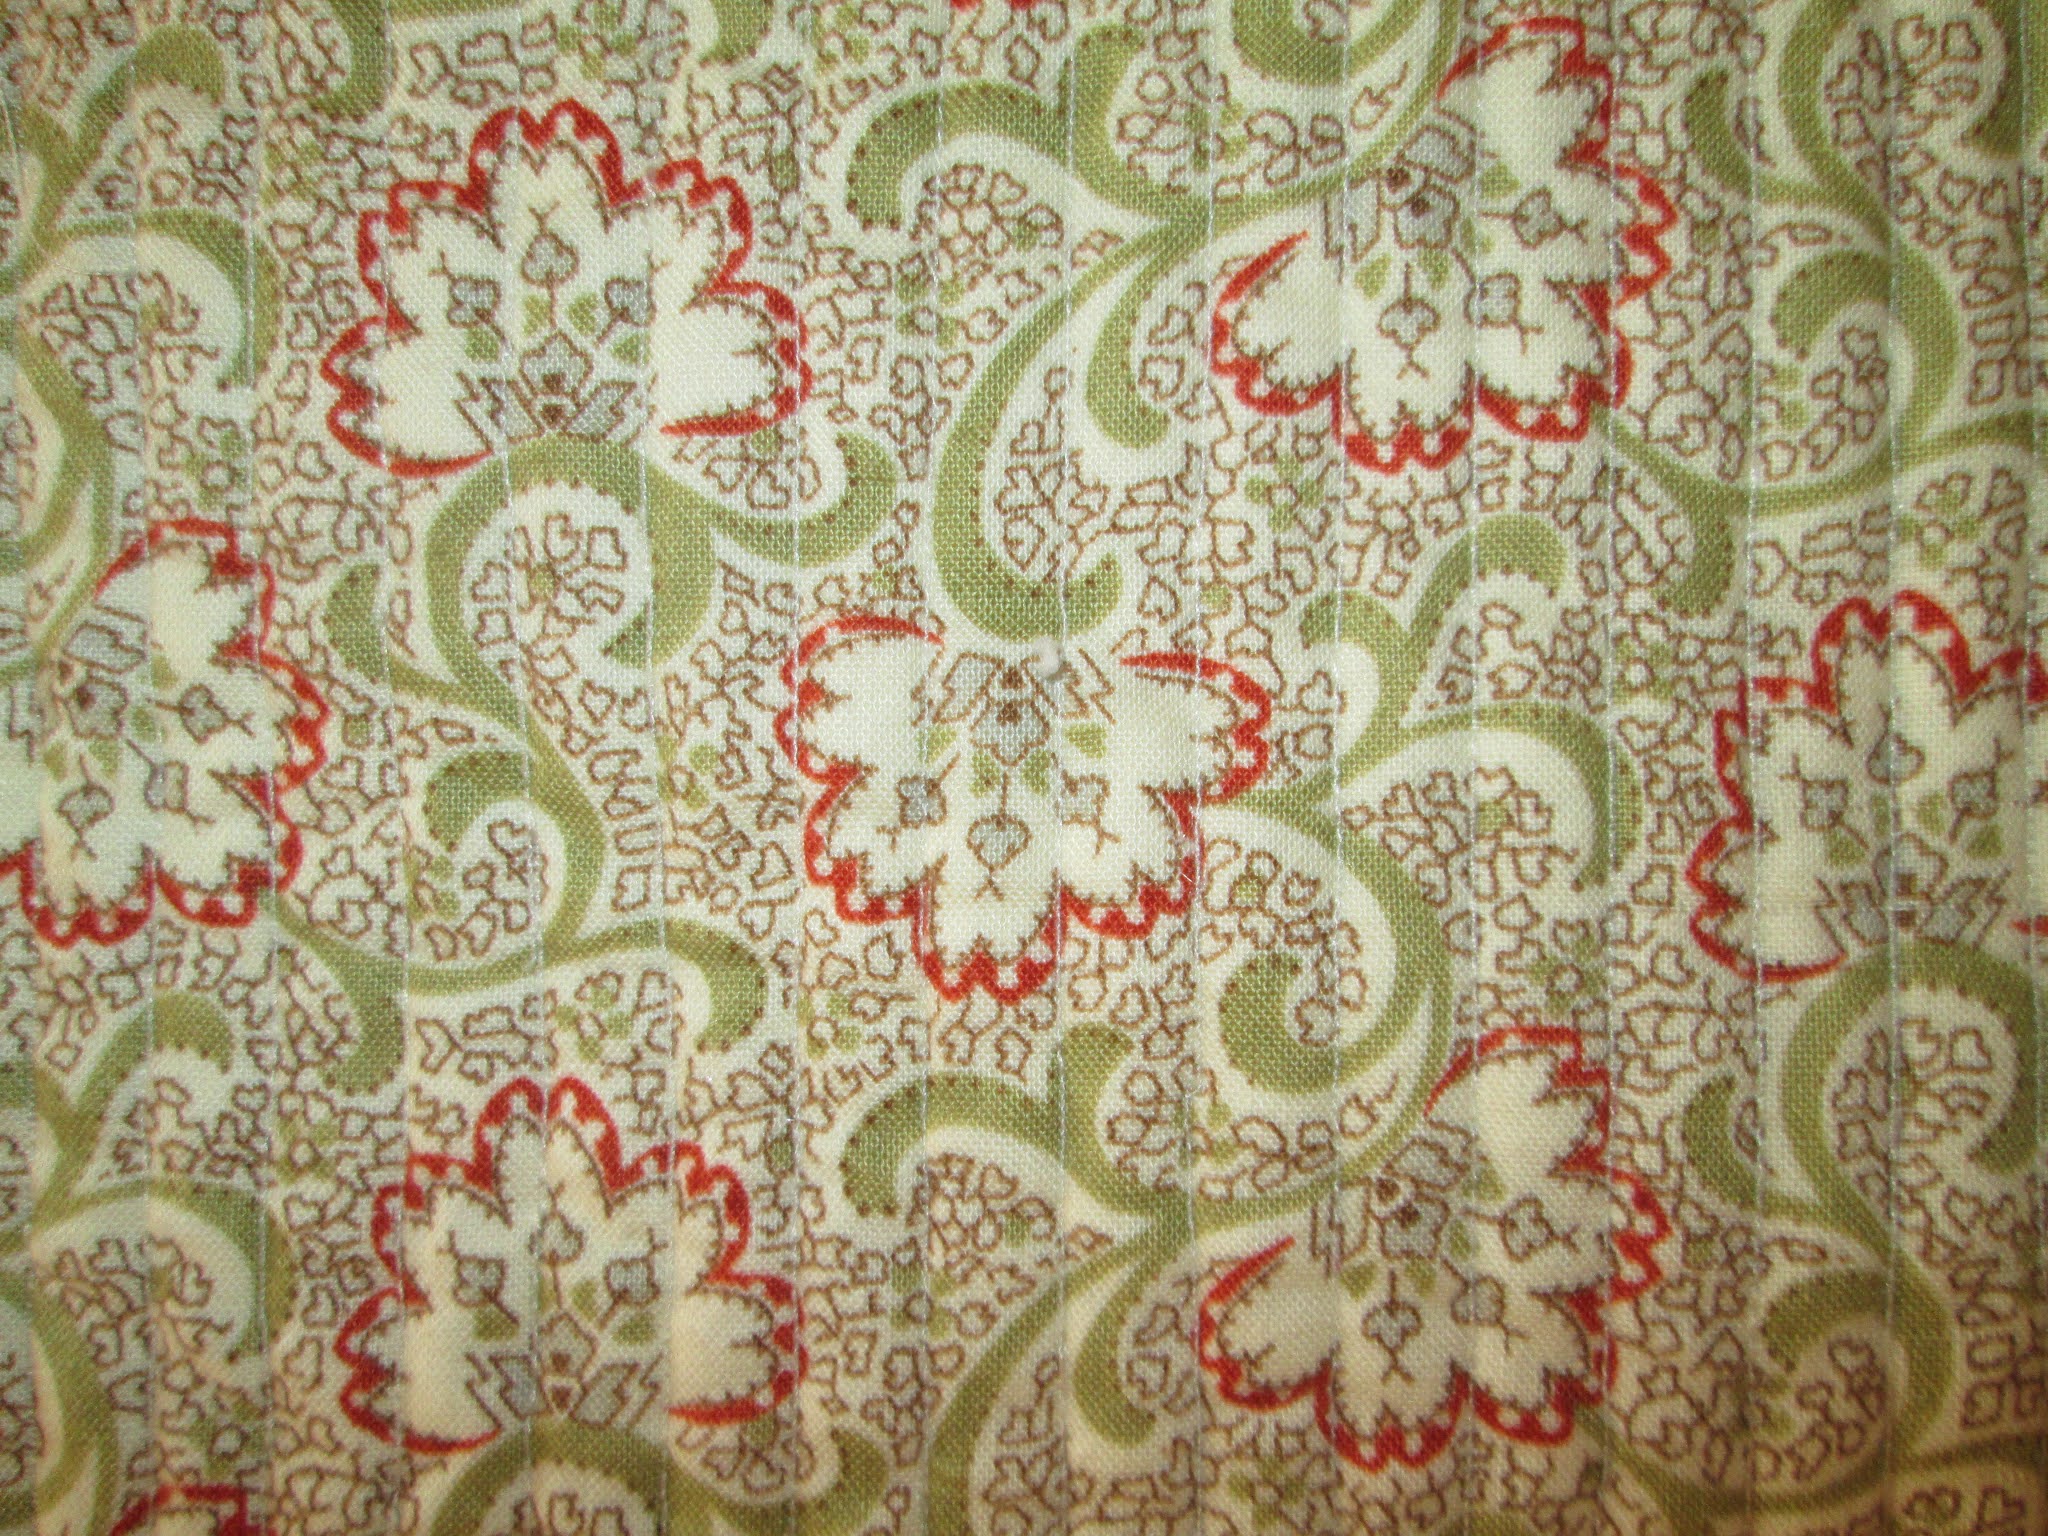
Then in late November 2019, I went shopping for quilting fabric. You can see the print I chose above, a poppy-like fabric with Art Nouveau-ish curves that I thought would accord well with my planned poppy and Art Nouveau-themed bedroom refresh. All things being equal, it would have been my preference to make the entire blanket in this print, but I went with a plain ivory fabric for the backing because it was $6/yard -- compared to the $10/yard price of the print -- and it kept the project cost down somewhat.


I don't remember quite when I began sewing. I had never done any quilting to speak of and was a little intimidated, but I think I took the initial plunge in January 2020, and I began quilting the blanket in vertical lines 3/8" apart. The finished size of the blanket is 78 x 83.5". That's 208 lines of stitching -- and I think I did a few more that got trimmed off when I evened up the edges. It was one of those situations where I didn't entirely realize what I'd gotten myself into until it was too late to get out of it. It soon became apparent to me that I had signed up for a LOT of repetitive work, which I quailed from doing. It wasn't until the pandemic hit in March 2020 and we were all told to stay home as much as we could that I really settled into the work of stitching all those lines, and suddenly I was obsessed with the project and it was all I wanted to do. I had to ration myself to do a certain number of lines a day (which I often mentally compared to doing lines of cocaine) because I needed to reserve some time and energy for other things, and because wrestling the thing into place and holding it there as I worked put a strain on my back. 

And I couldn't understand why I was suddenly so consumed with this project until one day it dawned on me. Does the print remind you of anything? Something that's been much in the news this year?


Does it remind you of anything now? Yes, that's right, readers, I spent a good part of the COVID19 pandemic obsessed with making a coronavirus quilted blanket. Before anyone psychoanalyzes me and says I chose the pattern out of some sort of unconscious desire to sublimate my fear of dying, my credit card statement for December 2019 shows that I bought the fabric for this project on November 29, 2019, before the virus existed. It was simply a coincidence... a very freaky coincidence. 

Then, deciding to truly embrace my pandemic experience, I created a special quarantine playlist, which I played while I was working on the quilted blanket. Since we're not out of the woods yet, I thought I would share it with you, on the chance that you might share both my twisted sense of humour and my middlebrow musical tastes:


My cat Trilby did his part to help me with this project by test-napping the quilt before it was bound. It seemed to pass muster.


Here is the finished quilted blanket in all its glory. Trilby, who is sitting on the blanket box, looks unimpressed, but we're just going to ignore him. Whenever I am working with fabric on the attic floor, he's fond of playing a game I call "cat surfing", in which he takes a running leap onto a large piece of fabric and uses his momentum to "surf" across the floor on the piece of fabric, and it was a big disappointment to him that this blanket was too large for him to take for a feline-style magic carpet ride.  

I finished the body of the quilted blanket in early April, but then it sat for some months while I tried to get myself to work on the binding. I'd never bound a quilt before, and I tend to postpone things that I am not sure I can do. But finally in early September 2020, I made myself do it, and as usually happens when I've been putting something off because I dreaded it, found it wasn't nearly so difficult or unpleasant as I expected. These Craftsy tutorials on calculating the amount of quilt binding needed and on binding a quilt were very helpful.


I should have stitched the underside of the binding by hand, but cheated and did it on the machine. I would never want to show this project to an expert quilter because it is definitely the work of a novice. The binding, besides being machine stitched, is uneven in places, and there is a place on one corner of the body where my lines of stitches, which are supposed to be straight up and down, take on a definite curve. But it's done, it's a nice-looking piece on the whole, it should last a good long time, it is lightweight and flexible, it should be warm, and I will be using it as a blanket not a bedspread, so the flaws in it won't matter much. 

 Whenever anyone asks me if there's any kind of needlework/textile crafting I don't do, I say "I don't spin, I don't weave, and I don't quilt". I've never had any real interest in quilting. I don't particularly like the look of quilts -- my tastes aren't Victorian or country -- and quilts don't stand up too well to being washed. I can't say this project changed my stance regarding quilting. I am glad I made this one, as I really needed a warm blanket for my bed (I've been piling several afghans on my bed during very cold winter weather in order to stay warm enough at night), and it's so gratifying to have that Thinsulate finally put to good use. I also learned a thing or two about making and applying binding that will likely come in handy in future non-quilting sewing projects. But I'm not sure if this project quite qualifies as a real quilt; I would describe it (as I have done in this post) as a quilted blanket. So, despite my experience with this project, and despite the fact that I will be making a 4' x 6' quilted blanket within the next year to use up what remains of the Thinsulate, I'm still not a quilter.

Tuesday, August 18, 2020

The Very Last Dress

My grandniece Cauliflower turned 11 this August. I've been making her a dress every other year (on the alternate years she gets a sweater), and it occurred to me this year that this year's dress will likely be the last dress I can make for her. After puberty girls need their dresses fitted on them, and it isn't possible for me to do that given that I don't see her often. After this year she'll just get sweaters from me, and I felt this very last dress needed to be special. 


I had a particular tartan fabric on hand that I loved. I'd bought the fabric on impulse in 2015, something I try never to do these days, as I am making every effort to buy only what I need and did not and do not need a new dress, but again this was years ago, before I began to crack down on impulse buys, and I will say that the fabric was on clearance and very inexpensive (I paid under $10 for the 1.9 metre piece), and that I still love it. I wanted to make myself a dress out of the tartan, but I thought that if I picked out a dress pattern for Cauliflower that called for a trim or sections of contrast fabric, that I could squeeze that out of the piece too. 

Accordingly I searched for a suitable pattern for Cauliflower's dress, and found one in the McCall's M7680 pattern you see above. I could see option B working in navy with a deep hem of the tartan and perhaps a ruffle of it around the sleeve opening. I bought the pattern, and I bought a piece of navy crepe for the body of Cauliflower's dress, and I cut out my tartan dress first, cutting very strategically to make sure I'd have a sizable strip of the tartan left for Cauliflower's dress.  


Here is the finished dress. It's a size 12, and it actually fit on my dressmaker form after I adjusted the form to be as small as it will go. I'm fairly pleased with it. It looks plain and tailored, but then it's my understanding that Cauliflower likes plain, simple clothes best. And she's not a little girl anymore -- she may be wearing this dress until she's 13 -- and it shouldn't look like a little girl's dress. 

The sewing of it didn't go quite as smoothly as I hoped. The body and the strip of the tartan at the bottom went together without issue, but then I got to the sleeves. The sleeves were very wide and I didn't like that look (nor would I like the feel of it -- how does anyone tolerate all that extra fabric flapping around their wrists?), so I cut them down, using a sleeve pattern piece from one of my own dress patterns as a template. Then I made the sleeve ruffles I had planned, sewed them on, and got the dress finished... and hated it. It looked as though I'd stitched a scrunchy around each sleeve opening which -- in case this needs saying -- was not a good look. I seemed to hate those stupid ruffles more every time I looked at the dress. I began to try to figure out a way to fix it, and eventually came up with the idea of replacing the tartan ruffles with tartan cuffs. I had very little of the tartan left by this point, so I explored the idea thoroughly first to make sure it would work before I touched either the existing ruffles or made a single cut in the remnants of tartan. 

The credit for my eventual success with the cuffs belongs to my beloved Vogue Sewing Book, which had an array of cuff and other sleeve finishing options to offer me, as well as detailed instructions for how to sew each one. I selected a split detached cuff option and, following the directions in the book, made a paper pattern for the cuffs and then did a trial run of the cuff pattern with a piece of muslin. The muslin cuff I'd made from my pattern worked after just one slight adjustment. I ripped the ruffles off the dress and cut the cuffs out of the tartan (this took some fussing, but I managed to squeeze them in to the small pieces I had left), prepared them, used the muslin cuff as interfacing, and then stitched them in place on the sleeves.


I'm pretty pleased with how the cuffs turned out. They look more or less professional. Cauliflower's present will also include the bracelet you see here, which was something of a find as it goes so well with the dress. Although now I'm wishing I'd made her a necklace to go with the dress instead, as it needs a necklace much more than it does a bracelet. I could still make her one for Christmas, I suppose....


And, of course, there had to be a matching purse for the dress. The purse has a tartan lining, and I made the little ribbon rosette you see here out a strip of turquoise ribbon from my ribbon canister and a half-dozen beads from my beading supplies box. Looking at it now, though, I think maybe I should have just left it without the rosette. I also think the rosette might have looked better if it were red. I thought I didn't have any red ribbon hand, only to discover I did after the gift had been given to my parents to pass along to Cauliflower -- it was in a box of Christmas ribbons I had stowed away in the gift wrap tote in the line closet, sigh. If only I'd remembered I had it.


The purse looks pretty good with the dress. I wish the tartan showed to better advantage in these pictures -- they just don't do it justice.


This is Cauliflower's gift in its totality: the dress, purse, bracelet, and a copy of The Girl's Book of Adventure, which looks like it has loads of fun pandemic-friendly activities in it, and (not shown) two masks that I sewed for her. When I'd assembled these items and was photographing them, I thought, "That kid has it so good." When I was a child, my family lived on such a shoestring that we usually didn't get birthday presents. I didn't receive any gifts at all for my eleventh birthday; we just had a homemade chocolate cake with candles on it at supper that night. The photo above depicts what Cauliflower's getting from one of her great-aunts for her eleventh birthday -- she will also have received many more, and much more expensive presents from her parents, brother, and very large extended paternal and maternal families. 

So... it's perhaps not such a shame that this is probably the last dress I will make for her.

Monday, August 17, 2020

A Wise Gift


My mother has a thing for all things owl. As she says, "They're wise. And they have big eyes." When trying to plan or buy gifts for her, I keep an eye out for useful owl-themed stuff that she would like. Over the years I've given her owl cloth shopping bags, an owl brooch, an owl Christmas tree decoration, an iron owl trivet, an owl tea towel, owl potholders, and a little red owl kitchen timer (you twist the head around to set it). 


When I came across the Oswald Owl cushion cover pattern, designed by Martin Storey, that you see depicted above, I knew it would be just the thing to make for a gift for my mother. It's a relatively simple yet striking design, and it's cute in a polished, adult way.


Here is my version of Oswald Owl. I used Loops & Threads Impeccable in Putty and Walnut Tweed. I was trying to keep it neutral so that my mother could choose where to put it in her house, and while I was making it went through a stage of thinking I'd gone too far on the neutral front, that the colourway looked dull and ugly, but once it was done I didn't mind the look of it. 


The pattern says just to seam the cushion together on all four sides, but I think it's worth the extra effort to put zippers in cushion covers -- it makes washing the cushion so much easier. I would have preferred the zipper to be the main colour of the cushion, but I didn't have one that colour and did have a brown one the colour of the contrast yarn in my zipper box, so I went with it. The one I used was actually one I ripped out of a brown hoodie I made and then had to rip out and knit again as a pullover because a section of it felted -- zippers are tough and durable and it's a good frugal and green habit to salvage them from worn-out or damaged items. 

I think the brown zipper looks all right. It doesn't show when the cushion is standing upright anyway, and it will be standing upright most of the time. I used the zipper installation method I came up with in 2018: make two crochet chains out of the yarn, sew them to the zipper, then use the loops of the crochet chain to sew the zipper into the cushion. (There is an illustrated and more detailed explanation of this method in this post.) 

I sewed my own pillow form out of some leftover ivory linen fabric I had on hand. I find that if you have remnant fabric on hand to serve as ticking, it's slightly cheaper to make pillow forms than it is to buy them (and it takes less time to make one than it does to shop for one), and one can also make them to exactly the size and plumpness desired. 

This cushion was my Mother's Day present for this year (along with two masks and a tissue case), though it was presented in mid-August. My mother wasn't enthusiastic about the cushion, but she didn't seem to actually dislike it either, and with her, that's a win. My sister warned Mum to keep an eye on this cushion when my niece Peaches or my grandniece Cauliflower are visiting her house, as they love owls too and the pillow might mysteriously vanish around the time of their departure.    

Mask R' Aid


I'm embarrassed to say that, although I did practice social distancing religiously from the outset of the COVID19 pandemic, I was a late adopter when it came to mask-wearing. It wasn't until May 24, 2020 that I went, maskless, to Fabricland to buy supplies to make masks, and then when I was waiting in the queue to get in, word came back along the line that Fabricland was requiring masks. I had checked their website before I came, and it had said nothing about masks being required, and there I facing the Catch 22 of having spent the bus fare and an hour getting to the store to buy materials so I could sew masks to wear, only to find I couldn't get in because I didn't already have a mask. There were other maskless people in that line up. We were stymied and disgruntled for a minute or two... but only for a minute or two.

Remember, this wasn't just any store, or any kind of customer in line that day. This was a line up of freaking crafters who were ten feet away from an excellent selection of new sewing supplies, and nothing was going to break our stride. We had skills, we had some materials and supplies in our bags, we had each other, and we rose to the occasion. 


One woman who had a mask offered to do my shopping for me, but although I really appreciated her kind offer, I very much wanted to pick out my own purchases. Another took out some swatches of fabric from her bag and said maybe she could rip some of them into smaller pieces for other people to use as masks, and she began to try to do that.

I dug through my bag to see if I had anything that might serve as a mask, not because I had any real hope that I had anything in there, but more out of a desperate desire to be doing something that might help rather than simply stand uselessly in line. I found I had tissues in the little tissue case in the front pocket of my backpack. I took out two. All right, they could serve as the material for the mask. Now, how could I fasten the tissues to my face? 

I had a needlepoint kit that I'd brought with me to work on while I was on the bus. From that I took out two lengths of tapestry wool and my tapestry needle, and I was in business (and cackling with relief and triumph until everyone around me was laughing too). I threaded one length of tapestry wool through each side of the tissues, and there I was with a mask. Not a very durable or practical one perhaps (it didn't breathe well), but still a mask that got me through the door of Fabriclands without any complaint from the store associate who was working as doorkeeper, and served me for the duration of my shopping trip. And I loaned the little red-handled scissors that were in my needlepoint kit to the woman who was still vainly trying to rip her swatches, and she cut enough pieces from them to outfit the other maskless women in line. And then we all got to go in and shop.

I'll just say here that this isn't the first time I've noticed how kind and cooperative the atmosphere is at Fabricland, though this will probably be my all-time favourite anecdote about it. Time and time again I've received helpful advice from other shoppers at the cutting table when I was discussing something with the store associate, and it's also common for shoppers to ask each other about their project plans and admire each other's selections. 


There were so many women there that day buying 100% cotton fabric for masks. No wonder -- it's not like most people had masks just sitting around waiting for a global pandemic to occur. In the early days of the pandemic, people were mostly tying scarves or bandanas around their faces, which made the streets of Toronto look like some sort of Jesse James convention was in town. 

I was planning to make masks to sell, so I picked out a selection of eight fabrics and bought a metre of each, as well as some packets of 1/4" elastic (the store had set a per customer quota on elastic, and were sold out of the 1/8" and round elastics). Earlier that day I had bought a package of pipe cleaners from the dollar store, and the day before that I'd researched mask tutorials on the net and selected one.  


I sewed five masks for myself using this excellent tutorial, took the above sample shot of me modelling one of them (nature never intended me to be a model, but it was either me or my cat, so what could I do), and then I posted a sort of ad on my personal Facebook page, setting out my terms for making and selling masks, and inviting orders for them.


As of this writing, I have made 31 masks: 5 for me, 16 for sale, and 10 to give away to family. The ten you see depicted above are the ones I made for my family: two for my father, two for my mother, two for my sister, and two each for my grandniece and grandnephew. I haven't solicited any more orders after filling the first batch I got, because the masks didn't turn out to be a viable way of making a reasonable return for the effort. It takes me not much under an hour to make one mask (production time per item probably gets a little more efficient if I make them in batches), and I sell them for $10 each, out of which I have to pay for materials. The sales from those 16 masks paid for my supplies and left me $100 profit, so I'm not sorry I tried it, but the hourly wage works out to not much more than half of Ontario's minimum wage, and I need to reserve my very limited energy for better paying work than that. 

But that's crafting for dollars for you. It's very difficult to make things for money, because any reasonable hourly compensation for the maker almost always makes for a too-exorbitant price tag on the finished product. 

Monday, August 3, 2020

Salmon, Olive, and Lime


This project came to be because I needed to use up the Loops & Threads Meandering Serpentine yarn I got in my stocking for Christmas 2019. I used up some of it making a sweater and matching tam for my honorary niece Olivia's Christmas 2020 present, but I still had 460 grams left. And that was more than enough to make a sweater for me.


I'm not thrilled with the look of the salmon colour of the yarn on me, but I thought it would be wearable if combined with a couple of greens. I had a 100 gram skein of lime green worsted yarn in my stash (which was bought so long ago I no longer know what brand it is), and all I'd have to do was purchase a single skein of olive green worsted. I searched Ravelry for a suitable tri-colour pattern and found the Vintersol design, by Jennifer Steingass, pictured above. It's really lovely. And then I purchased a skein of Red Heart Soft in Dark Leaf. It's an Aran, which wasn't an ideal combination for a worsted, but greens are tricky to coordinate, and that was the only skein Michaels had that was the right tone.


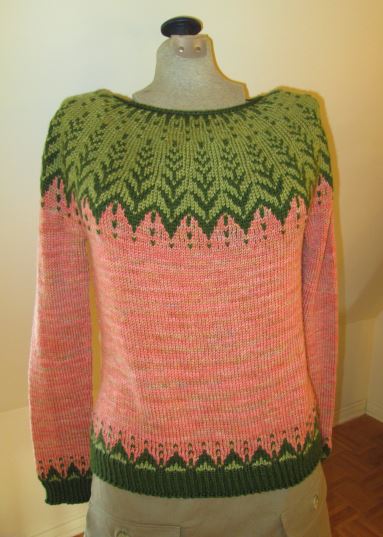
And here's the finished project. I knitted it almost exactly as directed, and just changed the shaping a little bit. The pattern called for the sweater to be wider through the hip section than in the chest area, but since I'm actually smaller through the hips than I am through the chest and don't need that extra width, I made the hip area of the sweater the same width as the chest. I'm still not taken with that salmon yarn, but it won't be right next to my face, and it's certainly a passable-looking sweater that will be fine (and probably nearly indestructible) for around home wear. I had to put an olive twill skirt with the sweater in this photo as I didn't have a skirt that would go with this sweater, but for actual swear I will pair it with the olive khakis I often wear around home in winter. 

This project used up all of the 100 gram lime green I had on hand, all of the olive green skein I bought, and 270 grams of the salmon, so that's a stash decrease of 370 grams. I still have 190 grams of the salmon left to use up. Oh well, I'm sure I can come up with another project plan for that. It is, after all, what I am so prone to do.