
This crafting project began when I cleaned out my hall closet late last fall.

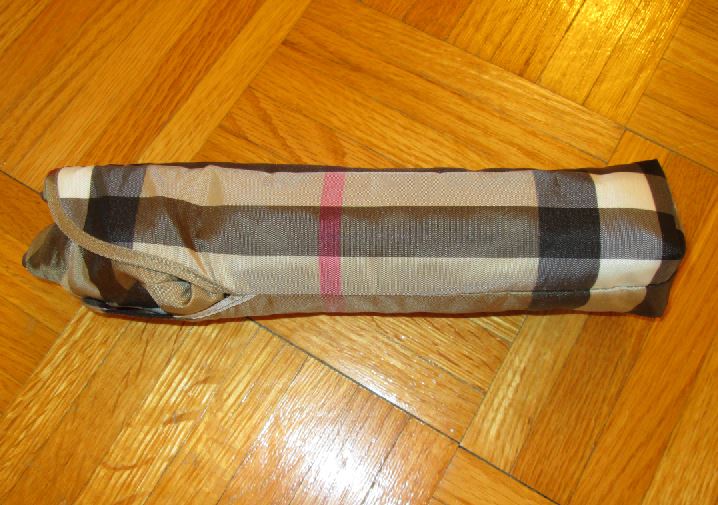
While cleaning out the closet, I came across two broken umbrellas. The compact that you see in the picture above is a Burberry umbrella that I bought via eBay years ago. It had a very frail structure that didn't last very long -- perhaps two or three outings. The walking umbrella below the compact is not a genuine Burberry, but one of the imitations one used to be able to buy in the early 2000s, before Burberry (understandably) began cracking down on the use of unauthorized/imitations of their trademark tartan. That walking umbrella stood me in good stead on rainy days for years, but eventually broke. It's impossible to find a Burberry-esque tartan umbrella now, and I can't afford even a secondhand Burberry umbrella these days, so I hated to just throw these umbrellas out. First I looked into the possibility of repairing the umbrellas... or rather the impossibility of repairing them. Then I turned to the idea of buying a new umbrella of the same size and stitching the old canopy on it, but though I kept an eye out for suitable new umbrellas for some years, I was never able to find umbrellas of the same dimensions, and had given up on that idea. I was tired of having a couple of unusable old umbrellas sitting around taking up space in my tidy closet, so I decided it was at least time to get them out of there.
I then ripped the canopies off the broken frames, threw the frames out, and ran the canopies through the wash. This redefined my challenge completely: now I had two fairly sizable pieces of no-fray, durable, waterproof, nylon fabric in an attractive tartan sitting on my sewing table. What might I do with them?
I very quickly decided I would make a tote bag out of the compact's canopy, because it would make a perfect stocking stuffer-type present for my sister who, judging from some of her pins on Pinterest, likes Burberry tartan just as much as me. I found a tutorial for a reversible lined tote bag on the net, and wondered what I could use for the lining. My sister likes black, so I thought some black nylon would work. I considered buying some. But before I could do that, I found a broken walking umbrella abandoned just outside the grocery store one day when it had been raining on and off and I was making a quick trip to the store to buy kitty litter during one of the non-rainy intervals. On my way back home, I picked it up and tucked it under one arm and carried it back to my house (along with a jug of kitty litter in each hand). I probably looked like a crazy person, but there was method in my madness. Once home, I ripped the black umbrella's canopy off its frame, threw out the frame, and ran the third canopy through the wash as well.

Cutting out the bag pieces proved a bit of a challenge. The compact-sized canopy just wasn't that big. I couldn't seem to find a way to lay out the half-size pattern piece twice on a fold the way the directions called for. In the end what I did was cut out the black lining pieces first and prepare two half-size paper pattern pieces. Then I pinned one of the black lining pieces flat on the canopy in order to use it as one full pattern, and then pinned the half-size pattern pieces on each side and chalked a 1/2" seam allowance for each. There was very little wiggle room for tartan-matching, but I managed to do pretty well on that score anyway. Just for the heck of it, I also ripped out the little Burberry tag that had been on one of the umbrella canopy seams. Then it was time to sew the pieces together.

The finished bag. I think it turned out pretty well, and even has a certain style to it.


The front and back of the tote bag. The pieced side doesn't look so bad. I thought seaming the two halves together made for a rather interesting effect.

The bag as it looks "inside out". My sister will have the option of using whatever look works best with her current outfit.

I sewed the original Burberry tag into the seam high on one side of the bag, then stitched the other three sides of the tag down (it wasn't a reversible tag). I thought it made for a nice finishing touch.
And for a final finishing touch, I rolled up the bag and stuck it in the original umbrella case. Having a little storage case for the tote bag will make it easy for my sister to keep the tote in her handbag for times of need.
So much for most of the compact umbrella canopy, and some of the black umbrella canopy. Now, what was I to do with the tartan canopy from the walking umbrella?


I toyed with the idea of making another tote bag for me, but I didn't much like the idea, given that I have a set of six tote bags already and don't need or want any more. Then one day an idea came to me. I've had the little case you see depicted above for over ten years, and use it to hold my manicure kit. It sits on a glass shelf in my bathroom, and looks nice there, but the lining had become stained. I was looking ruefully at it one Sunday morning as I was giving myself my usual weekly manicure, and thinking how bad it looked, and then it occurred to me that perhaps I could fix it by relining the manicure case. I looked closely at the lining and it seemed to me that it would be quite possible to replace it. Then I wondered what kind of fabric I would use to reline it, and it dawned on me that I had the perfect fabric on hand: a fabric I'd been looking for a way to use, that was waterproof nylon and could very likely be wiped clean in case of spills, and that would look really nice as a lining for that particular case. Who could ask for more?

The first step was to rip out the old lining. It was just fabric, cardboard, and glue. I kept all the pieces to use as patterns for the new lining inserts. The ribbons that hold the lid were still clean and in excellent condition, so I didn't remove them. While I had the case stripped down, I did some restorative gluing of some of the outer parts of the case that were coming loose.
I dug through my art supply cupboard and found some pieces of light cardboard I'd tucked away to use sometime -- things like inserts from a package of stockings, or remnants of poster board from some project. I did wind up reusing the strip of cardboard that lines the curved front side of the box, as I didn't have any cardboard of the size and flexibility to replace it. I always keep a bottle of glue on hand.

And here's the case with its new tartan lining.
The task of relining the case was pretty straightforward: I'd trace around the old piece of lining on one of my pieces of cardboard, cut the new piece of cardboard to match the old, cover the new lining piece with a piece of tartan nylon cut from the umbrella canopy using glue, and then glue the new lining piece in place in the reverse of the order that I'd stripped them out: first the bottom piece, then the curved side piece, then the back, then the lid piece. I elected not to put the mirror back in, as I don't need a mirror for manicures and pedicures. I'm really pleased with the new look.
But I did have quite a bit of that tartan walking umbrella canopy left, so....

I also made two new vanity cases out of the remaining tartan, and lined them with a white nylon lining fabric I had leftover from some project I made many years ago. One holds my emery boards, and the other holds my cotton balls and cotton swabs. I am as pleased with this manicure kit project as I was with the tote bag. I haven't just relined my manicure case -- I've upgraded it, and my only expense was two new zippers, purchased from Fabricland using a 50% off coupon.
But I still wasn't done.

I had been thinking for awhile that I must make myself some kind of tissue case to put in my backpack/shoulder bags/handbags, as I hated the way the tissues I carry around for any time of need get so rumpled and ripped and grubby before they're even used. I did a little googling and reading up on how to make tissue cases, and found that they're super easy to make. While I was planning to make a few for myself, I thought I might also make a few out of the umbrella canopies, if I had enough canopy left once I was done with the tote bag and manicure case projects. Again, umbrella fabric is waterproof, and should be ideal for keeping tissues clean and dry.
I did indeed have a little umbrella fabric left, so I whipped up the tissue cases you see above. (I used this tissue case tutorial, and then this tutorial on how to inter-fold the tissues.) The Burberry tartan tissue case (top left) is lined with more of the black walking umbrella canopy, and I shall give it to my sister when I give her tote. The other tartan tissue case (bottom left) is lined with another piece of the white nylon lining I used for the vanity cases, and I'm going to give that tissue case to my mother. Then I made two more tissue cases for me, the first (bottom right) from a remnant of jacquard decor fabric I had used for lining a handbag in 2018, and the second (top right) from remnants of brown vinyl and coppery brown satin lining I used to make a handbag in 2017, so I have tissue cases to match two of my handbags.
I think the Burberry tartan case is the nicest case of the four. The brown vinyl one is the one I am most dissatisfied with. I couldn't press the vinyl properly as the heat from the iron would have ruined it, and because of that, the top edges didn't come out even. This is a project that requires a fabric that irons into crisp folds. Oh well, it'll certainly do for now.
And that was the tale of three broken umbrellas, and how I used them to make three separate small presents, and to upgrade my manicure kit. Now the next time I see some poor, broken umbrella lying abandoned by the sidewalk in the rain, I may have to resist the urge to bring it home and show it some love.
Brilliant
ReplyDeleteYou have such good ideas! And what a good use of the umbrella case!
ReplyDeleteExcellent work in reuse! They look great.
ReplyDeleteWow, your project is so impressive, creative... and tenacious.
ReplyDelete