Wednesday, April 27, 2022

Tying My Own Apron Strings


I have never until recently worn an apron while working in the kitchen. My 83-year-old mother never has, despite having done more cooking, baking, and preserving than anyone else I can think of. However, while my mother never seems to get any food on her clothes when preparing food, I nearly always do, and I decided I was tired of putting on a fresh outfit on Saturday mornings (when I batch cook for the week and do laundry) only to have it acquire food splotches within the next few hours.

So, aprons. Which of course I was going to make. I decided I would sew three, as a supply of three would mean I could be reasonably confident that I'd always have at least one clean apron on hand. I found an apron tutorial online, and then I bought fabrics. I planned the apron colours with reference to both my clothes and my planned kitchen décor, which is to be cream, wood tone, and red, with touches of green and to have a poppy theme, and determined I would make a red apron, a green apron, and a brown and cream apron. For maximum versatility the aprons would all be fully reversible with a print on one side and a plain fabric on the other.       


The red apron. I love the Jacobean-style print I used for this one. Fabricland actually carried poppy print fabrics, but I found I didn't like the look of them. This one's close enough to being a poppy print for my liking. 

The apron tutorial I used called for the apron straps to be made out of one of the two fabrics, but I made one change to the style of the aprons by making the straps out of both fabrics so that they'd be reversible too, like the body of the apron. 

I do wish I'd cut the aprons to fit me better. I am very well-endowed, and in order to have the waist tie at my waist, I have to adjust the bib ties to wear the bib lower on my chest than I like. Cutting a longer bib would have prevented that, which I should have realized from the outset -- after all the dresses I've made for myself, it's not like I don't know my chest takes up extra length. But I didn't think of it, and by the time I clued in I was far enough along in the process that I didn't feel like going to the trouble of backtracking and fixing it. It's no big deal, though. I can wear the bib a few inches lower, and if/when I ever make another set of aprons, I will remember to tailor them better. 


I scored another lovely print fabric for the green apron. It's a William Morris-style Arts and Crafts print. It actually had the William Morris name on the edge of the fabric, which means it's probably licensed. It's a print that will go well with my Art Nouveau-inspired décor touches.


The third apron, with a solid brown fabric on one side and a cream stripe fabric on the other. By the time I was done making this one, I wished I'd made the entire apron in plain brown. I used brown thread on the brown side and ivory on the cream, and those stitches showed through on the opposite side when I was top stitching, to the detriment of the final appearance of the straps. But there will probably be times when I am glad I have a cream apron to wear instead of a brown one, so it'll do.

And now I can bake and boil and brew in style. 

Monday, April 25, 2022

Sewing Sleepwear


One spring day perhaps eighteen or nineteen years ago, I went shopping for a new summer nightgown. I was looking in Toronto's massive Eaton Centre, where one would expect there would be a good selection of pretty much anything, but though I spent a few hours scouring every possible store, I couldn't find anything I liked. I got frustrated. And then it dawned on me... perhaps I could make myself a new nightgown. I took the northbound train to Yonge & Bloor, where there was (at that time) a Fabricland, picked out and purchased a pattern and a fabric I liked, and was on my way home in half an hour. 

I've never bought any sleepwear for myself since that day. I sew my own cotton nightgowns for summer and plaid flannel pajama bottoms for winter, and pair each pair of pajama pants with a thrift shop long-sleeved t-shirt in a coordinating colour. My practice is to keep my nightwear drawer perpetually stocked with three nightgowns and three sets of pajamas, replacing individual items whenever necessary. I reuse the same nightgown and pajama pants sewing patterns over and over, which helps keep the replacement cost down to under $25 per nightgown/pajama set, and they always last for years. The result is attractive, comfortable, inexpensive nightwear. I'll just add here that I also do have a lovely little spring green embroidered silk chemise that was given to me years ago and that I keep for, um, "special occasions", but there's been a sad dearth of special occasions in my life of late years, sigh.  


This is the cover illustration from Simplicity 9505, which is the nightgown pattern I bought all those years ago. My pattern is considerably the worse for the wear, though it's still usable. I used option C, which is the short-sleeved nightgown you see on the right. I'm not sure how many times I've made it up -- perhaps seven or eight times? It is so easy and inexpensive to make, requiring only 1.5 metres of fabric, some elastic, and maybe two hours of work. I still like the pattern, but a few years ago it began to feel as though it was getting to be too young for me in style. And also too short -- it's never been safe for me to bend over in it. While I may be single, I do need to be considerate of my neighbours, who are nice people and deserve better than to be subjected to an entirely unsolicited peep show every time I run out to put out the garbage. I decided it was time to invest in a new nightgown pattern, one more suitable for a woman approaching her fifties.


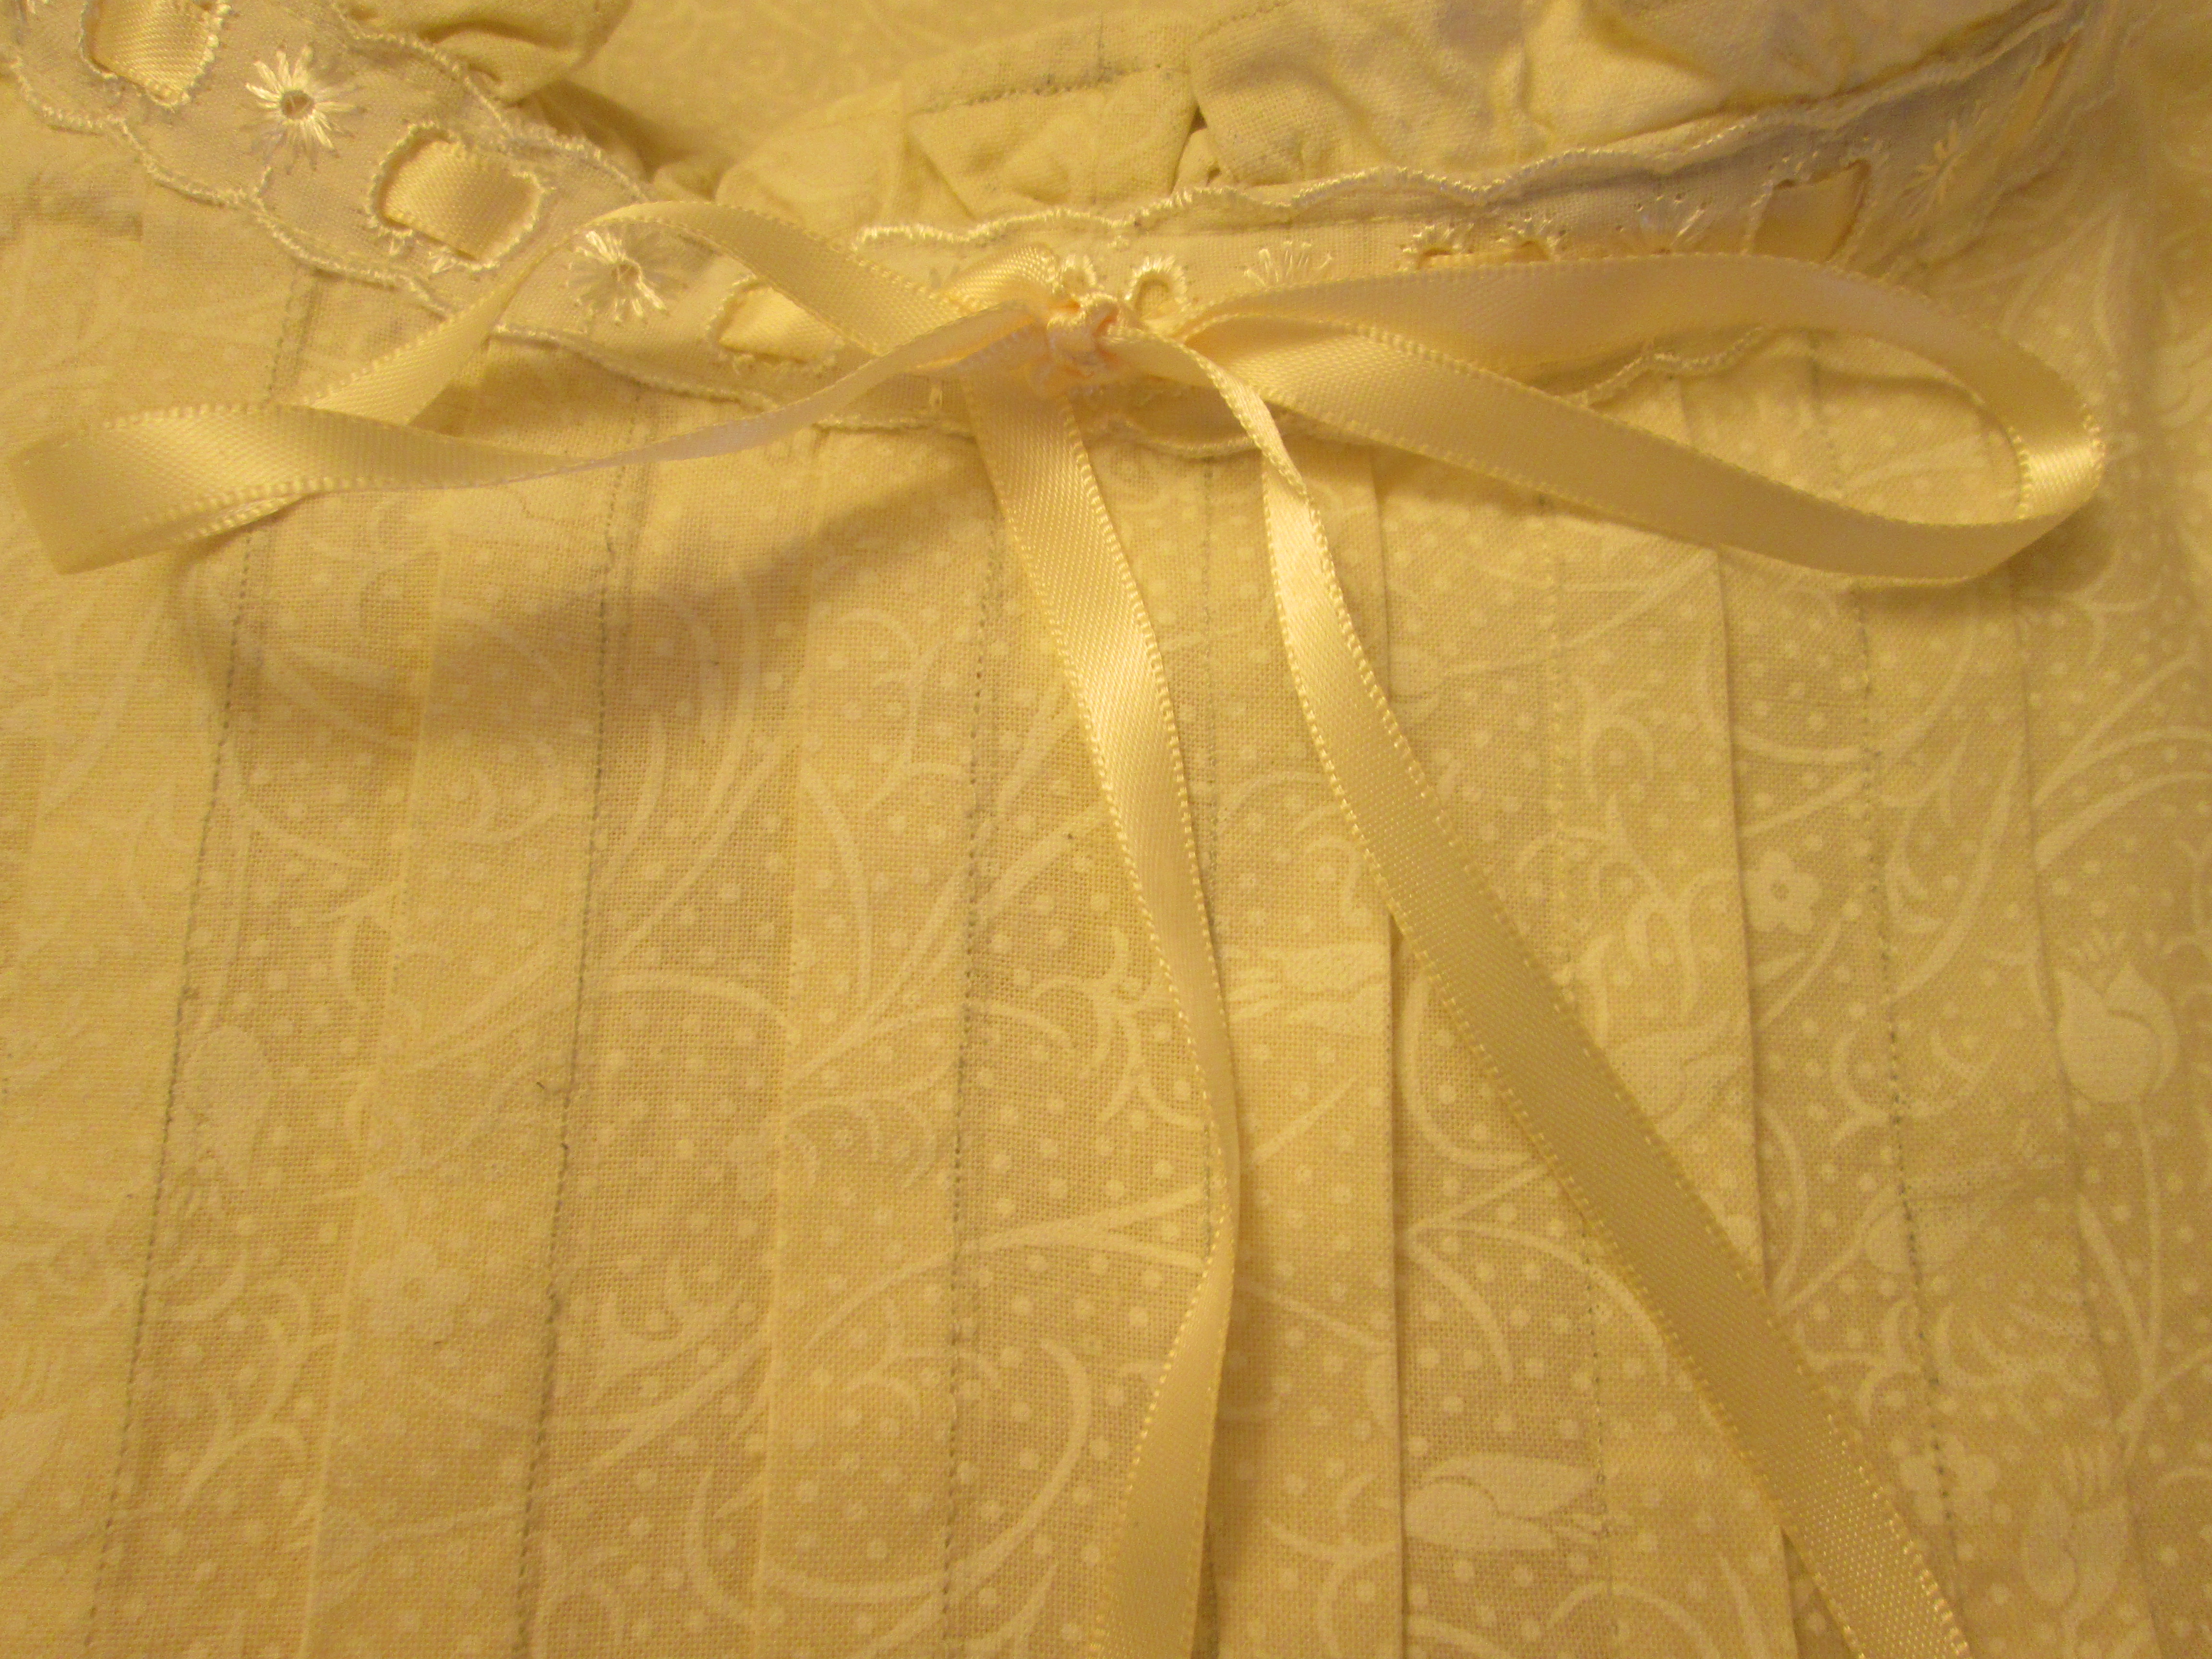
After browsing through the pattern catalogues in the spring of 2021, I decided on the pattern you see depicted above, which is Butterick B5792, view B, which is the one in the middle of the front row  It's more work and expense than the old nightgown pattern (note the tucked bodice, and the lace and ribbon detailing, and it also calls for bias tape around the neck and sleeve openings), but I thought it was rather pretty. I might be using some of the style options at some point too. I could use view D with short sleeves if I want to make a plain nightgown with no ribbon trimming. I'm even thinking of making myself a long-sleeved plaid flannel nightgown in option D the next time I need a new pajama set. 


These are the patterns I chose for my new set of nightgowns: a green pinstripe, a tone on tone cream print, and a peach and gold floral. I'm not crazy about the floral and wish I had kept shopping around for something I liked better, but I can live with it.


I had some difficulty finding the beading lace for around the neckline. I think ribbons are pretty, but I don't like lace very much, as I find it too fussy and Victorian-looking. I don't think there's any lace in my entire wardrobe except for some narrow trim on some of my underwear. I didn't like the only beading lace Fabricland carried in the required width. I toyed with the idea of knitting or crocheting some beaded lace, and I may do that next time, but for this set of nightgowns I ordered 4 yards of a cream cotton eyelet lace from an Etsy vendor. Even with shipping the eyelet lace cost less than the Fabricland option, and it looked more like a ribbon than like lace.


Here's the green pinstripe nightgown, made in size medium with slightly larger than called for seam allowances. I couldn't find green ribbon in the right shade for it as I had hoped, so I just used a cream ribbon. 


I couldn't find peach or apricot ribbon as I wanted for the floral, and had to go with a ribbon that was a cream with a slightly peachy tone to it. But again, it looks fine as is.


Here's the cream one. I rather wished I'd gone with a crimson ribbon for it, but the cream on cream look is fresh and pretty enough. 


I had approximately a package and a half of single fold bias tape which I had thought would be enough to do these three nightgowns, but I ran short. It would have cost me $6.50 in TTC fare to make the round trip to the nearest Fabricland just to buy more, so I improvised, and made my own bias tape, which I used to finish the armholes on the cream nightgown. I had never made bias tape before, but it went so well I'm going to be keeping the technique in mind for the future. It saves money, and it can look better to have matching bias tape made out of the garment's fabric than to choose from the limited set of colours commercially made bias tape comes in. 

And now I have three new knee-length cotton nightgowns demure enough and classic enough to be age appropriate, and hopefully also airy enough for Toronto's hideously hot summer nights. 

Wednesday, April 13, 2022

Clothes-Providing Friends


One day in March 2020, while idly scrolling through my Twitter feed, I saw a tweet authored by my friend Christine in which she'd posted a photo composition of Celine Dion in two very unfortunate outfits that were reportedly styled by a friend of hers, with the query, "... if your friend does this to you on purpose, are they really your friend?"


I must admit that if a friend of mine tried to get me to wear any of these outfits, I'd question their understanding of me, their motives, and possibly also their sanity. I've made a number of pieces of clothing for Christine over the years (by my count, if I'm not forgetting anything, four sweaters, a suit jacket, and a jersey dress), and couldn't help thinking complacently that all of those pieces definitely looked better than... what you see in the photo above. 


Our little exchange of tweets on the matter got me thinking that it had been so long since I'd made Christine anything -- I believe she received the last item in 2010 -- that she had probably worn out all the things I'd given her, and I really ought to make her something new. I added "sweater for Christine" to my knitting project list and picked out a pattern for it, but I didn't get to it that year, nor in the following year. In late 2021, when I was working on a tartan table set for my friend Lindsie and deciding that it would be her 50th birthday present, I also determined that I would definitely get Christine's sweater made in early 2022, and that it would be her 50th birthday present. 


The sweater above is the Veneto Sweater, designed by Handmade Closet. It's a lovely design and it struck me as being perfect for Christine. I could just picture her in it. 

As for the yarn selection, Christine's favourite colour is cranberry red (two of the four sweaters I have made for her have been that colour), so I decided this sweater would be a cranberry red with, if possible, a variegated yarn in warm cream/tan/light brown tones for the contrast colour. Christine is blond with a tan skin and brown eyes, and such a colourway would suit her very well. 

It took a few yarn store visits to find what I wanted, but I eventually purchased 300 grams of Sandnes Garn Sisu Superwash in Cardinal (shade 4228) from EweKnit, and one skein of Pro Lana Golden Socks Fjord 4-Fach (shade 181).  


Here's the sweater, which knitted up without difficulty. I made it in a size 3, which has a 36" bust. I did make the body longer than specified in the pattern. Christine isn't tall (I'd estimate her height at 5'3"), but she has a proportionately long torso, and the 20.5" length called for by the pattern would be too short on her, so I added one inch to the yoke length and two to the body length. I also added waist shaping. The resulting sweater should fit. I've never measured Christine, but all of the pieces I've made for her have fit quite well. With knitwear, one can usually just eyeball the size. 


As with Lindsie's gift, Christine will also be getting a jar of my lavender jelly, two tissue cases, and some homemade cookies for her birthday. The plan is for me to host a birthday lunch for Christine and Lindsie at my house, as they were born just nine days apart and, though the two of them only know each other through me, they enjoy each other's company a lot and are very fond of each other. I have the menu and decorations planned, and I'm looking forward to giving my two closest friends what I hope will be a special and fun birthday celebration, with gifts that are more satisfactory and aesthetically pleasing than the outfits assembled by Celine Dion's friend.  

Tuesday, April 12, 2022

The Tartan Suit That Wasn't


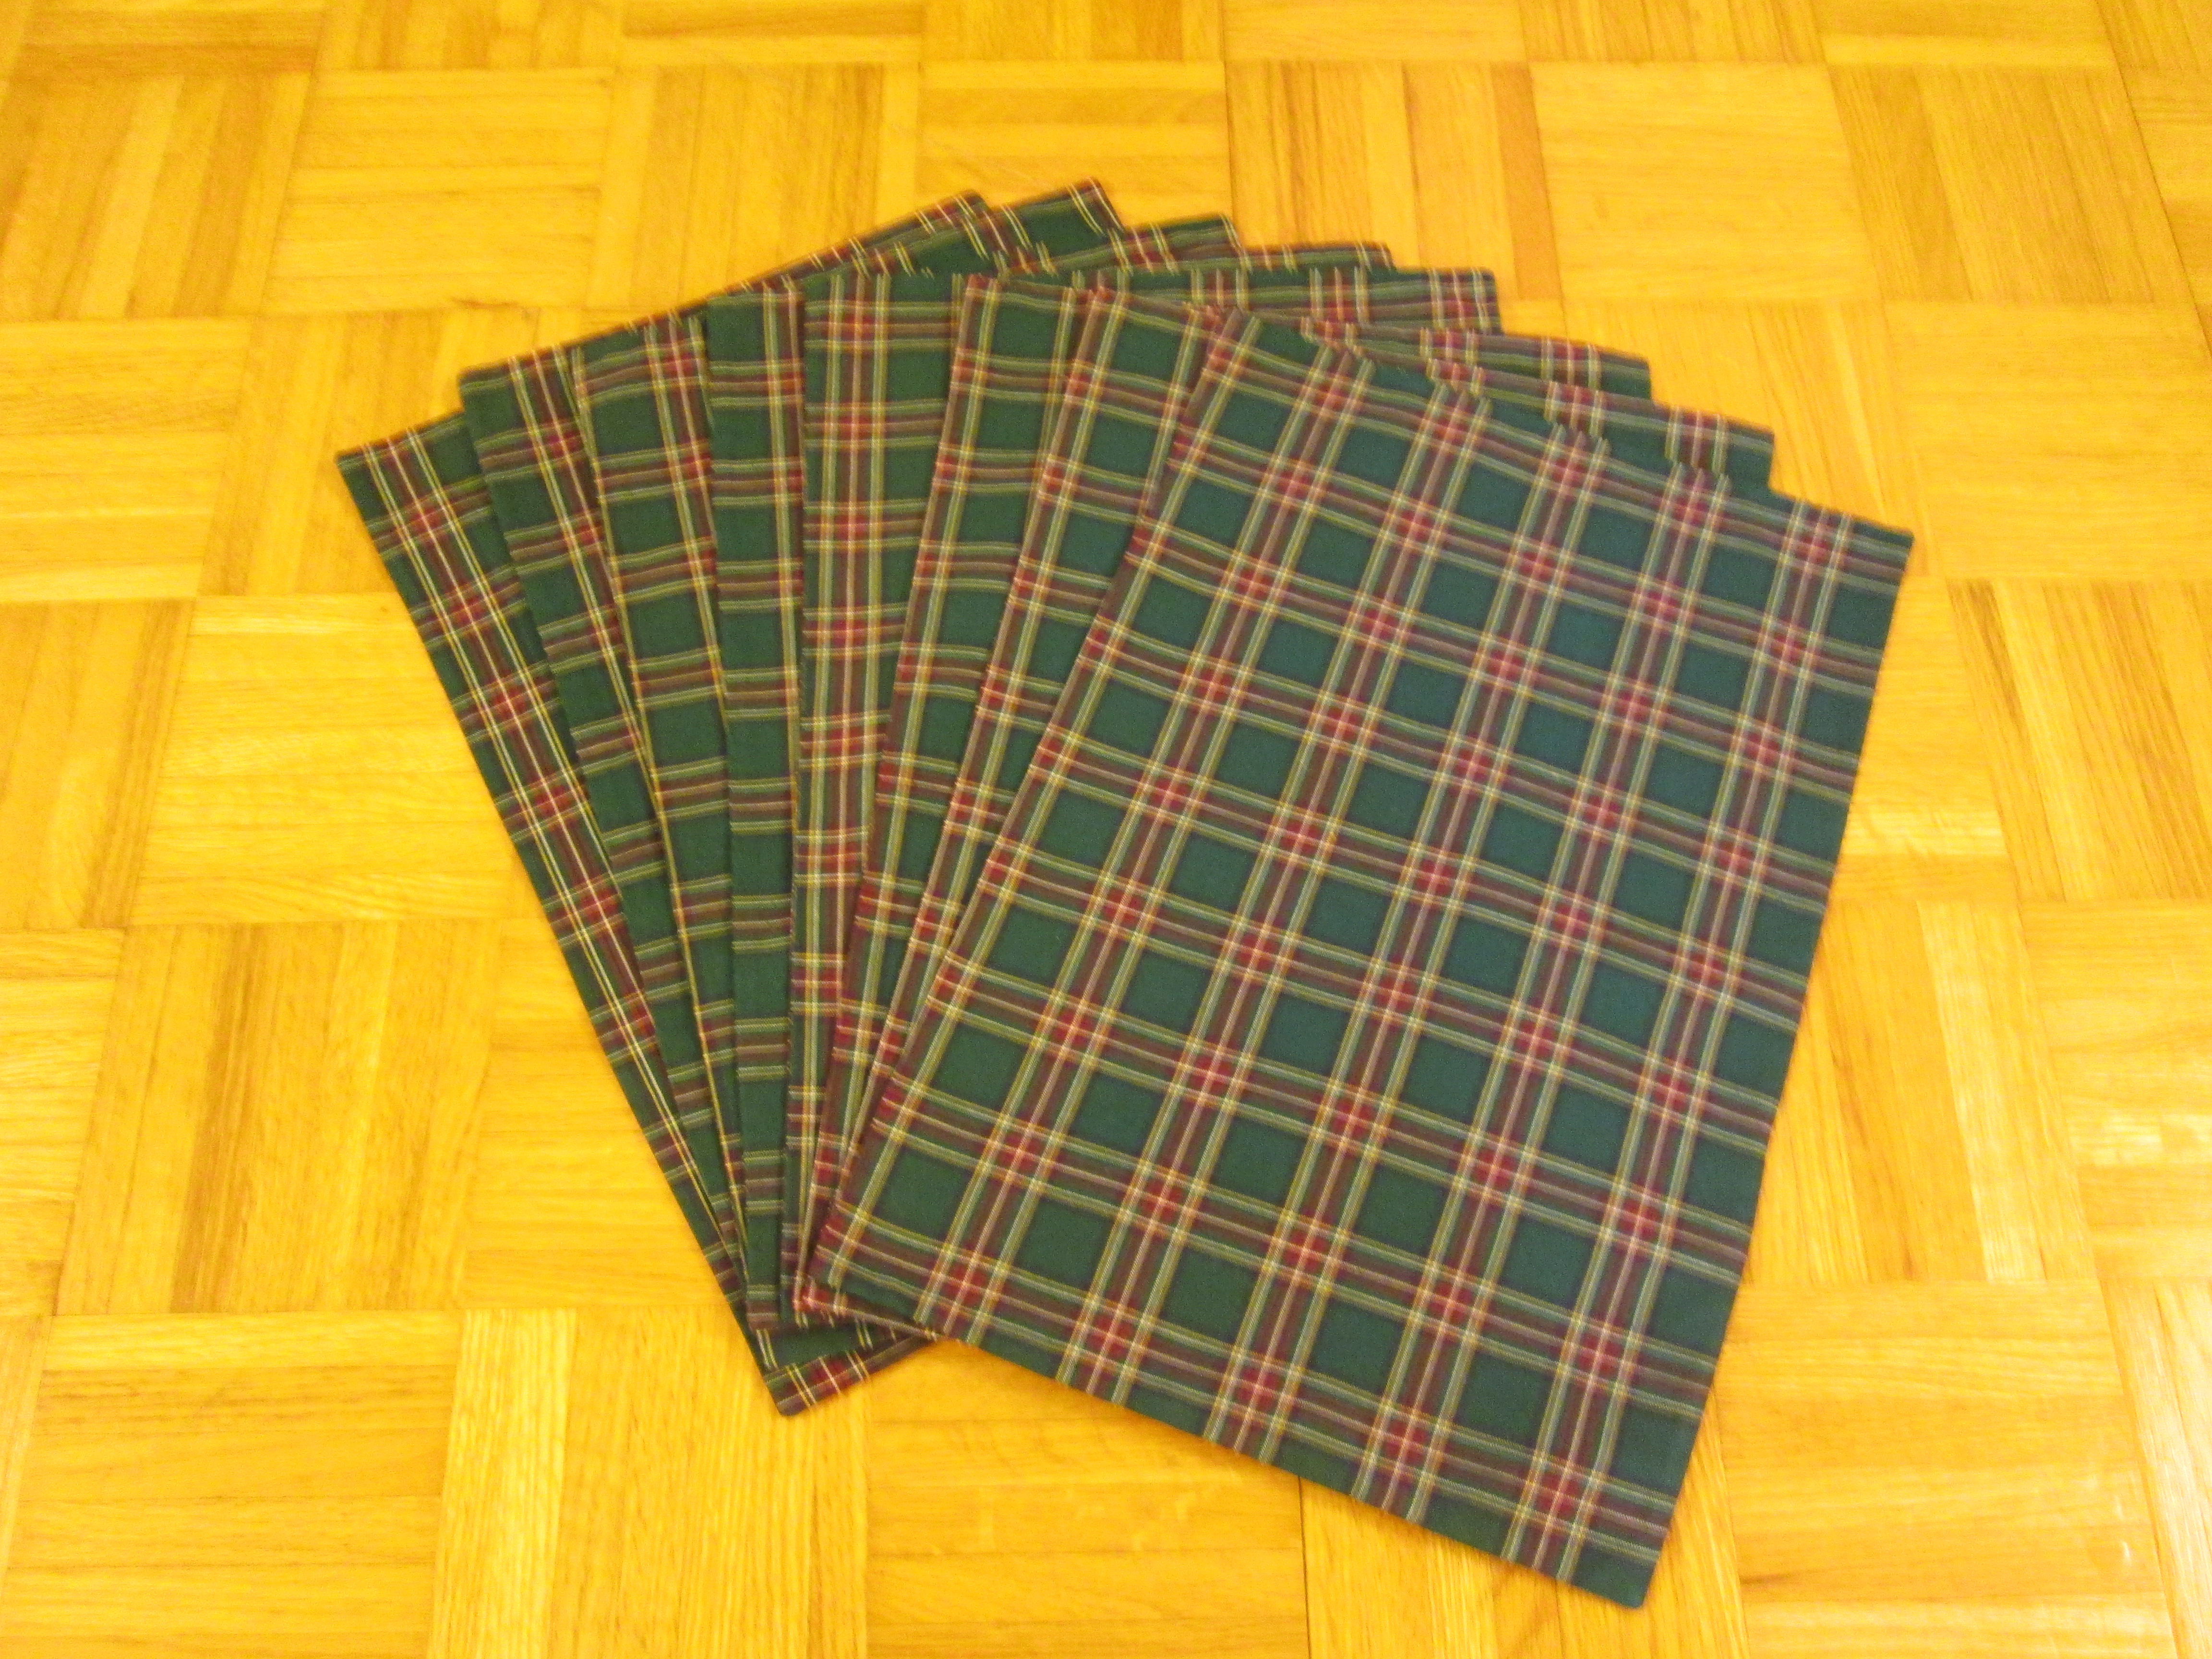
For Christmas 2020, one of the items in my Christmas stocking was a piece of the tartan fabric you see depicted above. Unfortunately, the colours in the photo are not terribly accurate. When seen in person, the background green is a dark forest green, and the red is very dark, more like a burgundy. There was 4.5 metres of it, and I don't remember how wide the fabric was, but I think it was more than the standard 150cm/60" wide. This sizable roll of fabric was my crazy generous sister's idea of a stocking stuffer (we use... large... stockings in my family), and Alanna's expectation was that I would make a suit for myself out of it. 

It took some time for me to evolve a plan to use all the fabric (there was SO much of it), but my first concern was actually to identify the tartan. When I asked my sister where she had bought it, she told me loftily that she "never reveals her sources", so that was a dead end. (Alanna rather prides herself on her shopping abilities and takes her shopping Very Seriously.) 

I theorized that the tartan probably wasn't an official tartan, as if it were, it would have been labelled as such and Alanna would have told me what that label was, but I thought perhaps it might resemble one. I did a bit of cursory and discouraging googling, and then I turned to the Metafilter community as I tend to do when stymied on any sort of research. The consensus there was that it resembles the Princess Mary tartan.  

The Princess Mary tartan, which is based on the Royal Stuart tartan, was created in the twenties and named after George V and Queen Mary's only daughter, it then being the fashion to name tartans after the British royals. My fabric is indeed quite similar, except that it is without the lines of blue that are in the Princess Mary tartan, so I'm going with that.

That settled, I began to think about what I would do with the fabric. I didn't want a tartan suit, as I have no place to wear such a thing, and the fabric wasn't really my colour palette anyway. But I thought perhaps I could make a skirt, trousers, and a waistcoat out of it that I could wear. I estimated how much fabric it would take to make the three items out of the fabric, and then decided I would not make the trousers, but instead make just a skirt, waistcoat, and a set of placemats. The placemats wouldn't be for me, as they wouldn't go with my dining room, but I thought they'd make a nice gift for my friend Lindsie, and that her partner would like them too, as he has Scottish roots and he and his entire family is very into their Scottish ancestry. 


When thinking about the placemat design, I did some Pinterest research. I initially had ideas about doing some sort of applique design on one side of the placemats, perhaps of a Christmas tree or a stag's head, but I soon ruled that out. I saw a number of unadorned tartan placemats on Pinterest, and I liked the clean, spare look of them. Tartan doesn't need tarting up -- it stands on its own. Besides, fancy placemat design is wasted effort in the end, because one can't see the design once the place settings are on the mats.  

I made a set of eight tartan placemats and they turned out pretty well. They are 18.5" wide and 12.5" inches deep. I didn't get the cuts as straight or as centred as I would have liked, but they'll do.

Now it was time to make the skirt and waistcoat. But after I dragged my heels on that for awhile, I began to think it would be nice idea to make a set of napkins with tartan trim to go with the placemat, so why not forgo the waistcoat and do that?


The idea of the waistcoat vanished into the ether, and I made a set of nine 16" x 16" napkins to go with the eight placemats. There was enough of the white fabric to cut out a ninth napkin, so I made nine. Lindsie will have a spare if one gets stained or torn, and meanwhile she can use the extra to line a bread basket.   

I wasn't that thrilled with this phase of the project. The tartan trim was so much stiffer than the napkin fabric that the resulting finished napkin felt a little unwieldy. My mother thinks the tartan will soften from repeated washings, which is something to hope for. I also underestimated how much time the trim would take to do. The machine sewing didn't take that long, but then I had to handstitch the tartan binding in place on one side, and it took well over two hours to stitch down the binding of a single napkin. When the end of December 2021 came and I only had two napkins done out of nine, I resolved to stitch one side of a napkin each day in January. I kept that resolution fairly well and had the remaining seven napkins finished by the end of January 2022. 

Once I'd made the tartan napkin bindings, there wasn't a lot of fabric left. I could no longer make a pleated skirt, but only a straight one. And I began to think about what I'd wear that skirt with, and how I would probably have to get a new sweater and shoes to wear with it.... and then I began to think about a table runner. 


And yes, the rest of the tartan fabric did in fact become a table runner. The finished item is 10.5" wide and just a smidge over 8.5' long. It's not one long piece of fabric as it should be, but I was able to piece the tartan in a fairly well matched way on one side, and Lindsie can always put a centrepiece or something over the seam if she wants to. 


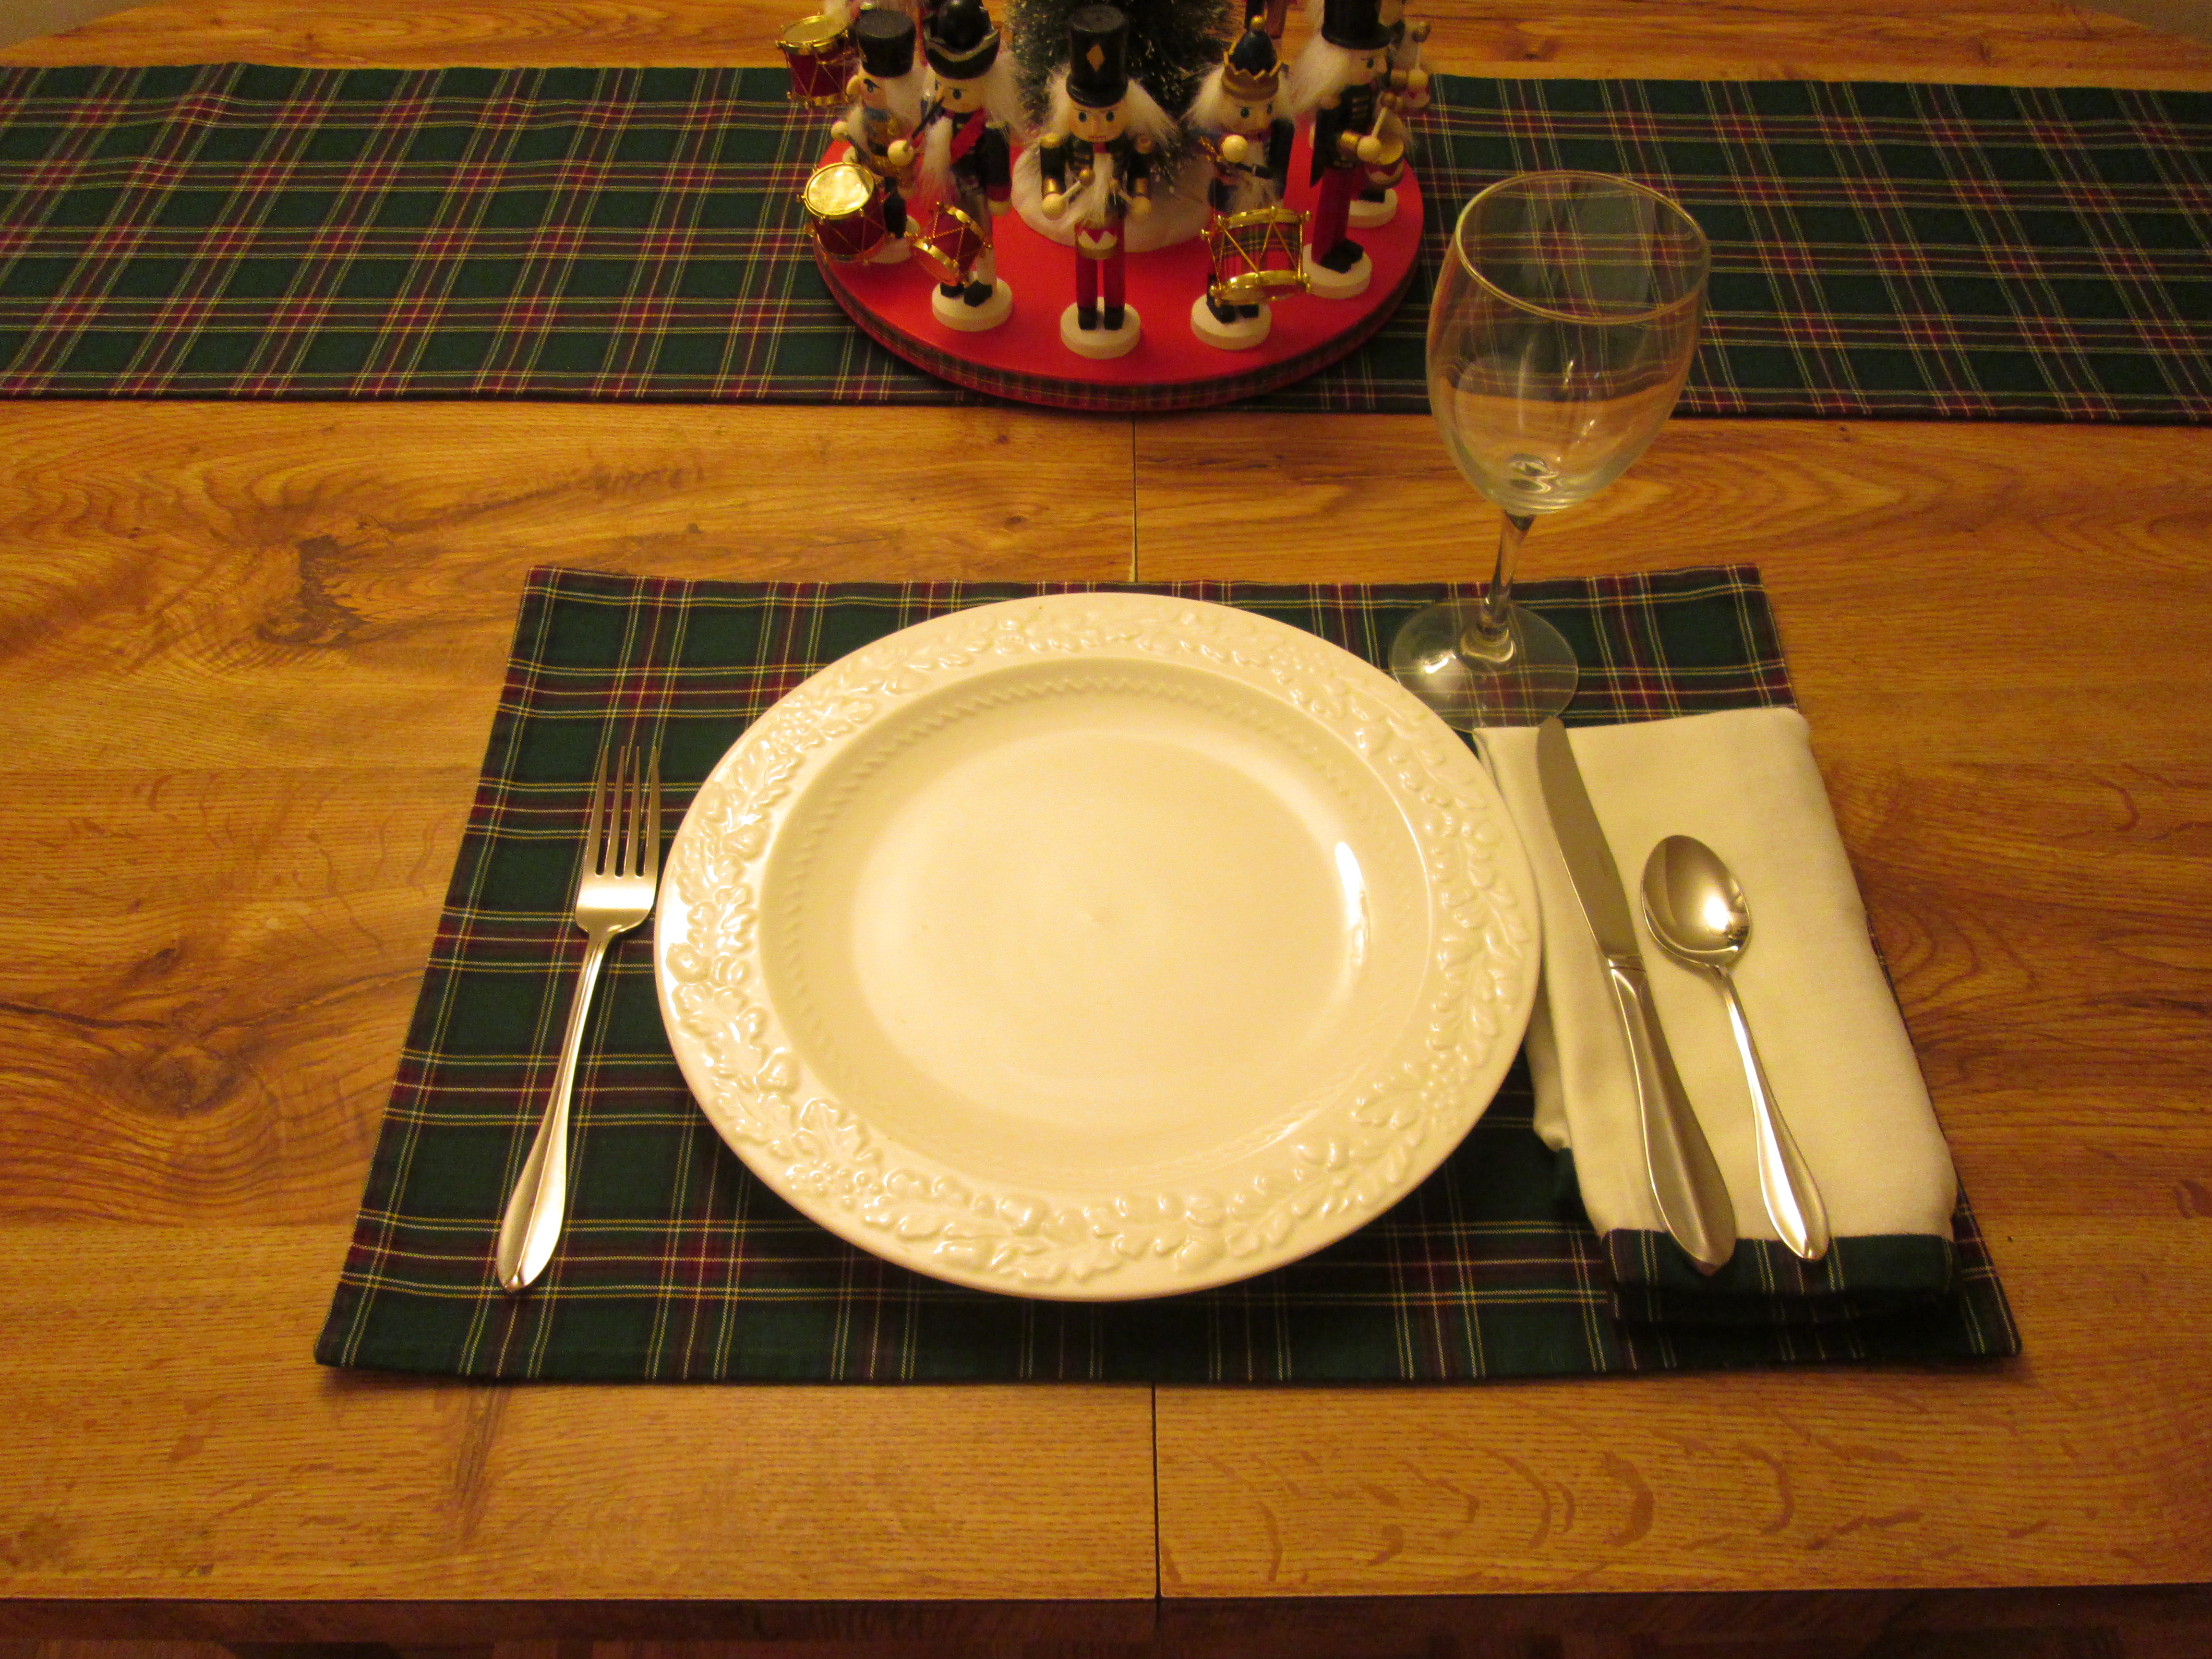
My photos of the napkins, placemats, and table runner on the floor were so unimpressive I decided to do a little staging. Here's how the table runner will look on a not too-large table with a centrepiece hiding that inconvenient seam. 


I put together a table setting, using my own tableware, to see how the placemat and table napkin would look in action. Not too bad. I do consider this table set flawed, but it presents well enough if one doesn't look too close. 

And what began as a gift I was making just to use up fabric has become my gift for Lindsie's 50th birthday. She and my friend Christine, who are my two closest friends, are both to reach the half-century mark in May 2022, and late last year I decided I would make them each a special gift for this milestone birthday -- something that they could use and enjoy for years -- and also have them both to Swan's End for a birthday lunch. The date of the lunch is yet to be determined as one of them can't make weekend plans right now due to some family stuff, but I'm looking forward to it. I haven't seen either of them since before the pandemic began, and as I've told them, it was so considerate of them to be born only nine days apart so that I would only have to prepare one birthday meal. 


In addition to the table set, Lindsie is also to get two tissue cases, a jar of my lavender jelly, and some cookies, which I'll bake once I know the date of the lunch. I think she'll feel appropriately celebrated.

As for Alanna, I think she's a bit miffed I didn't make myself that three-piece tartan suit, but she did approve of the table set, and at least her gift wasn't wasted -- I didn't throw out more than a handful of scraps of that tartan. 

Thursday, March 24, 2022

Well Dressed, Well Accessorized, and Well Cuddled


On New Year's Eve 2021, when I was making plans for the coming year (and with me, making plans means making to do lists), I was looking over my gift list and realized I needed to plan a Christmas 2022 gift for my expected grandnephew, and despite (or perhaps because of) the effects of a tumbler and a half of homemade Bailey's, that evening seemed like the perfect time to plan a sweater for the little guy. What better pandemic-style solo New Year's Eve could I have?


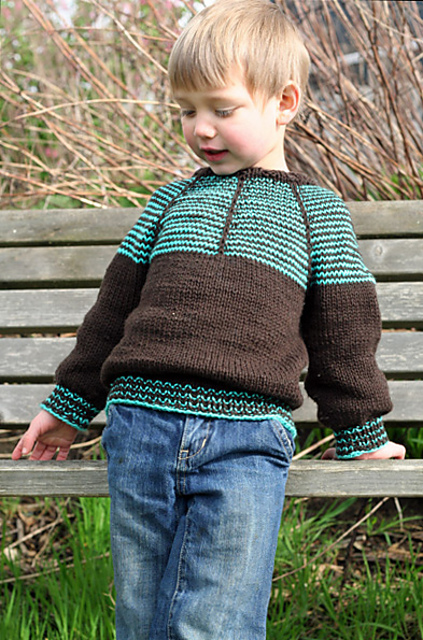
I browsed patterns on Ravelry, and selected the one you see depicted above, the Everyday Pullover Sweater, designed by Raya Budrevich. I've made it before (for my grandnephew Bug's second birthday), and I remembered it as a quick and easy knit that I'd been satisfied with. Then I checked my stash to see what yarn I might have that would work for this project. I found some chocolate brown worsted (the ball band for which was long gone), and most of a skein of Red Heart Soft in Leaf. I thought the two colours worked together and there would be enough of both to get the job done.   


And here's the finished product, which I knitted in a size 12 months in January 2022. Sawyer will turn ten months old in December 2022, so my hope is he'll be able to wear the sweater as soon as he gets it on Christmas Day and have some growing room so that it will fit all the rest of the winter. 

I like the combination of the dark brown with this green. 

This sweater took 30 grams of brown yarn, and 110 grams of green yarn, with a net stash decrease of -140 grams. 


As for the remainder of Sawyer's Christmas gift, I thought I'd make him a teddy bear using a pattern I've had on hand for many years and have used I don't know how many times. I can make a toy rabbit and a teddy with these patterns in something like two and a half hours using whatever fabric I have on hand. Back when I had an office job, I used to make these stuffed toys as shower gifts for my co-workers' babies and everyone made an undue amount of fuss about them. One of my co-workers, a woman in her early sixties, even asked me if she could commission a bear or bunny from me because she wanted one for herself, and I promised her I would make her one for her retirement party. 


I added "teddy bear" to my 2022 sewing list, but it turned out that I had no need to make a bear for Sawyer, as I had one on hand that I'd made some years ago and forgotten about -- I usually make two at a time, as I find it more time efficient. This brown stretch velvet bear, with his cream satin neck ribbon, will do perfectly well for Sawyer.


It amuses me that the sweater and the bear coordinate so well. Sawyer will spend his very first Christmas well dressed, well accessorized, and well cuddled. 

Friday, March 18, 2022

A "Welcome to the World" Gift


On my birthday in August 2021, when my parents and sister came to my house for a birthday lunch, my favourite gift of any that I received was the news that my nephew Luke and his wife were expecting their first child in February 2022. Of course, my immediate response was to start planning what I was going to make for my impending grandniece or grandnephew. By the end of that day I had decided I would make the baby a baby blanket, a pair of booties, and a framed counted cross stitch motif with the baby's name on it out of a kit I had on hand. I selected suitable patterns for both a baby boy and a baby girl, and messaged Luke with my congratulations and a request that he let me know if he and his wife were having a grandniece or grandnephew in advance, as I'd be making something for the baby and would need some lead time. In due course, he dutifully let me know that they were expecting a boy. 


The pattern you see above is the one I'd selected for a boy, the ABC Baby Blanket, designed by Jenny Williams. It's an attractive, easy, quick knit. It could even be an excellent stash buster if one knitted the squares in different colours, but I wanted a solid colour for my version. 

The yarn I chose was Lion Brand's Wool Ease in the Stillwater shade, which is what I would describe a light sea green. It's 20% wool, 80% acrylic, which gives it both the nice feel of wool and makes it easy care and (I hope!) durable, which is just what one wants in a baby blanket, especially if this particular baby has inherited his father's trick stomach. 

This project knitted up quickly and without issue. As I worked, I thought back to the baby blanket I had made for Luke when he was born in September 1987, just a month after my fourteenth birthday. In those days I didn't have much access to patterns or yarn. I never even knew Vogue Knitting magazine existed at that point -- that revelation would come when I saw it on the newsstand in a convenience store when my mother and I stopped to get milk one evening the following spring. The baby blanket that I made for Luke wasn't made according to a pattern at all. I knitted a number of garter stitch squares in pastel blue and white baby yarn, and sewed them together. I'd never make something so basic now. I don't think I even wove in the ends, and I know the squares weren't properly seamed together. I was, after all, only thirteen. But that hackwork baby blanket became Luke's blankie and he was very, very attached to it. Over the next several years Blankie became very much the worse for the wear. It was no longer the fresh blue and white it had been when new, but rather grayish, with a number of "you don't even want to know what made that" stains and discolourations, and was fraying and raveling in a number of places. It got to the point that it was such a repulsive object that I could never see it without wanting to scream, "KILL IT WITH FIRE!!!!" and stuff it in the wood stove at my brother's farmhouse. 

Then one mid-winter day when Lukie was four, he took his blanket outdoors with him when he went out to play, left it outside, and didn't realize it was missing until bedtime. Luke became agitated and wanted a search to be made, but trying to find a grayish blanket after nightfall on a farm in mid-winter in Southwestern Ontario is an exercise in futility if I ever heard of one. The blanket could have been anywhere in quite a large, unlit area, there were piles of snow everywhere, and it had snowed that afternoon. My brother tried to take the tough love approach, saying to him firmly at eight o'clock, "No Luke, you took your blanket outside when you shouldn't have and you lost it, and you're just going to have to go to bed without it and we'll have a look for it tomorrow." This stern parental reasoning was apparently lost on Luke, as when ten o'clock arrived he was still screaming. Sympathy, substitutes, bribes, and threats were also of no avail. My brother and his wife were, as my sister-in-law has put it, "out there like a pair of fools with flashlights and shovels until well past eleven" in a desperate effort to find the blanket, while Luke stood at the storm door, alternately and repeatedly screaming, "FIND IT!!!!! FIND IT!!!!!" and sobbing loudly. They couldn't find it. Luke ultimately passed out from sheer exhaustion at about midnight, after he'd been carrying on non-stop for four hours straight.  

I have thought of that first baby blanket I ever made and of that incident every time I have knitted a baby blanket since, and hoped I wasn't kickstarting a similar chain of events for the new baby's poor parents. And now I've come full circle, and have knit a baby blanket for Luke's son. I wouldn't wish an evening like that on any parent, but I suppose if it should happen my brother and his wife's reaction will be something along the lines of, "PAYBACK SOMETHING SOMETHING, LUKIE."   


The finished blanket. It's much nicer than the one I made for Luke, with a better design, better yarn, and better workmanship, and I am pleased with it, but I can't help feeling that perhaps it should have been scarlet or some other eye-catching colour, lest it get left outside at night. 

I purchased all new yarn for this blanket, and had 55 grams leftover, so that's a stash increase of 55 grams. 


When I first began searching Ravelry for patterns for a baby blanket and booties for my nephew's child, I thought something hockey-related would be a fun idea. Luke loves hockey as much as most Canadian men do, which is to say to an extent that is beyond all reason. During a hockey game in late 2007, when Luke was 20 years old, he got hit in the face with a puck, and it smashed four of his teeth. Luke proceeded to remain on the ice, playing and spitting out fragments of teeth, until the game was over. Surely my needlework skills could produce a softer, gentler tribute to his love of hockey than his dental work. I initially even toyed with the idea of making a Maple Leafs baby blanket in tribute to Luke's favourite team, but I would have had to design one myself, which I wasn't particularly interested in doing, and besides, this baby is an Albertan. I don't want him to be a social outcast or a laughingstock among all his baby friends. 

Among the hockey-related patterns to be found on Ravelry were a few designs for hockey skate booties. There were both knitted and crocheted examples of that design concept, but though I don't enjoy crocheting, there was no denying that the crocheted version was much cuter. Generally speaking, crocheting is stiffer than knitting, but while knitting tends to be the better choice for clothing because it drapes better, crocheting often takes the lead when it comes to shaped objects like toys, and one wants the object to hold its shape. The sample knitted hockey skate booties looked so limp and floppy compared to the crocheted ones. I set my teeth, resigned myself to crocheting my grandnephew's booties, and went with the Newborn Hockey Skate Booties, designed by Jamie Louise. When I checked my yarn stash, I was pleased to discover that I had black, gray, and white worsted yarns on hand that were suitable for this project. I no longer have the ball bands for any of the three yarns I used, but they were run-of-the-mill acrylic worsteds. I did have to buy a 3.75mm crochet hook, but now I'll have that size hook in my crochet hook collection for the next time I need one. You can see the resulting booties above, and I think they turned out well, and that Luke will get a kick out of them. 

These booties, which were made entirely out of stash yarn, weighed in at 50 grams when finished, so that's a stash decrease of -50 grams. 


Several years back, I happened to come across some counted cross stitch kits in Dollarama for $3.50 each, which is a very good deal for that sort of kit -- one could easily pay ten times as much for a comparable kit from a regular retail outlet. With money so tight, I try very hard not to buy things for the indefinite future, as I need to focus on fulfilling my many immediate needs, and I didn't even know of any impending babies at the time. However, these kits (which were all the same pattern) were so very cute and the price was such a great bargain that I made an exception and bought three kits. After all, I was very likely to use them all eventually. Then, when I got to cash register, the kits rang in at $3 a kit, which put the total expense after tax at $10.17. 

On the day I heard that there was a new baby on the way, I thought almost immediately of those three gifts, and went to the attic to get one of them out of the chest of drawers where they were stored, pleased that my investment had been justified, or at least 33.33333% justified. I started the kit that very night. I think it took me about two months' of needlework time to finish it, although I worked at it in fits and starts between August and January. By the end of January, I'd finished all of the cross stitch but the little section that was to contain the baby's name, and I'd also bought a thrift shop frame for it, and researched how to frame needlework. 

Sawyer was born in mid-February, and I got right to work on the name section, finishing it in a matter of days. Then it was time to frame it. I'd never done any framing to speak of before. Professional framing used to be one of my few extravagances, but I can no longer afford such a thing, and it was time to learn to do it myself. I paged through a book on framing that I'd bought at a thrift shop some years back, and looked at online tutorials and videos until I felt I had some idea of what I was doing. 

The simple wooden frame I bought at Value Village for this cross-stitch piece was the right width but something like 2.75" too wide, so I removed the bottom edge, cut down the sides using my handsaw and mitre box, and glued and nailed the frame back together. I then cut a piece of foam core board to fit the frame, and mounted the cross stitch on that using sequin pins. Then it was pop the foam core board into the frame, turn down the little metal tabs at the back, stick on a backing of brown craft paper, and add a hanging wire to the back. It turned out pretty well for a first attempt at framing. The needlework isn't perfectly straight, but it's straighter than either of the two professionally framed pieces of needlework I have in my house. And I like the way the tone of the wood accords with the colours in the cross stitch. It should make a nice addition to Sawyer's room for the first three or four years of his life.

There was originally glass in this frame, but I elected not to cut that glass down for the new frame size. This present had to be shipped to Alberta, and I was concerned that the glass might break on the way, and worse, damage the needlework. Not including the glass would also help keep the shipping cost of this gift down. 

I haven't gotten to meet Sawyer in person yet, and don't know when I will. My nephew and his wife and their son live in Alberta, and I can't afford to travel there. They will be visiting Ontario every few years, pandemic conditions allowing, but they'll mainly be visiting Luke's immediate family, who live two hours from me in a region where public transit doesn't go (I don't own a car), and they will have so many people to see during their time in Ontario that they won't be coming to Toronto just to see me. It isn't likely I'll ever see Sawyer more often than once every two or three years. But if I can make things for Sawyer's birthday or Christmas gifts that he routinely uses and enjoys, I can hope to have a little place in his life, and perhaps even help instill the kind of lifelong appreciation for handmade things in him that people who grow up having things made especially for them by loving family members tend to have.   

Anyway, this gift has been wrapped and packaged and posted and is currently on its way to Alberta, where I hope it will prove a suitable welcome to the world gift for what, judging from his pictures, looks to be a cuddly, happy little guy.  

Monday, January 3, 2022

A Calculated Project


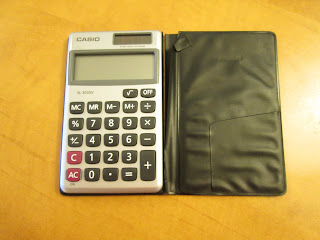
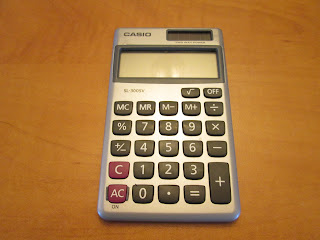
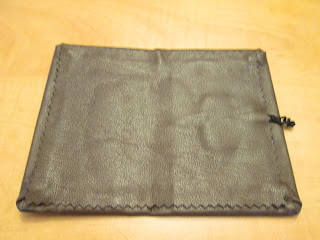
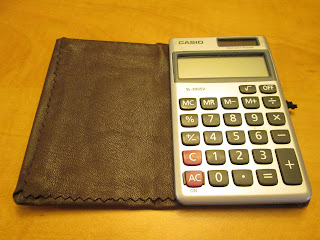
I bought the calculator you see above at the age of 22, circa 1995 or 1996, for something in the neighbourhood of ten or twelve dollars. Twenty-six years later, while the calculator was still in perfect shape and working order, its black plastic vinyl cover had become cracked and torn. I'd been meaning to make a new cover for it for awhile, but when in December 2021 I began to take my calculator with me to the grocery store every week and pre-total my groceries before checking out as a way to make sure I stayed under my grocery budget, I decided it was time to get moving on that project. I wanted my calculator to look nice if I was going to be taking it out in public, and the old cover was very close to falling completely apart. 


I did consider just using the calculator sans cover, but then I reflected that there was probably a reason that the calculator still looked perfect while the original cover was in such bad shape. Notice how the number pads are still clearly legible, and the screen is unscratched? No, the calculator needed protection from wear and tear, and must have a new cover. 


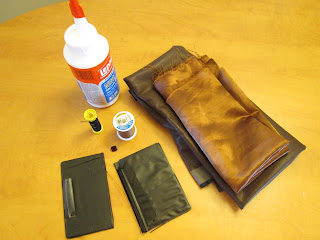
This wasn't a project I was going to find some handy tutorial online for -- I was going to have to figure it out on my own. I gathered some supplies: brown vinyl (left over from when I made a handbag), lining fabric, coordinating thread for both fabrics, glue, thread elastic, a button from my button tin (it was one I had cut off a worn-out blouse I was throwing out), and the old cover, which I could employ as a pattern.  


I laid the old cover on the fabrics and used it as a guideline to how big the new piece should be -- the pieces needed to be the size of the old cover plus a good margin that I'd be folding inwards. The piece of fabric you see in this photo was supposed to be the lining piece of the cover, but I ended up not using it for reasons that will soon be explained.


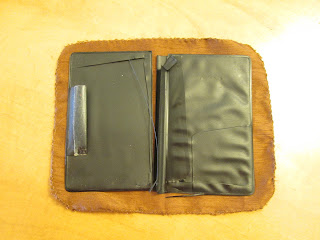
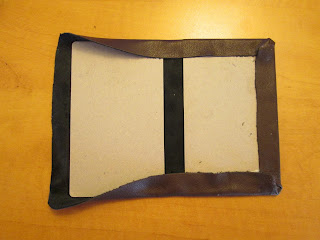
I cut the old black covers apart and pulled out the cardboard pieces that had given them their shape. Though I had planned to use the cardboard pieces as pattern pieces for new ones, they were in such pristine condition that I simply reused them for the new cover. Leaving room for the flexible spine of the cover, I placed the cardboard forms on the piece of vinyl I had cut, and folded in and glued the edges of the vinyl. 


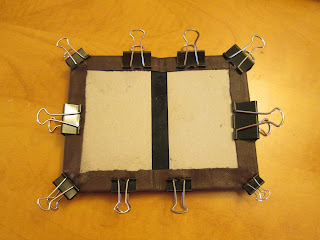
I used bulldog clips to secure the cover's inner edges until they could dry. One can't pin vinyl as it will leave holes, and it would be very difficult to pin it over cardboard anyway. 


The old cover had no fastener, and had always annoyed me by constantly flapping open. And it had always seemed so awkward to me that the spine was on the right side -- it seemed to me it should be on the left, as with a book. I decided that my cover would be oriented to flip open like a book and would also close securely. I considered a tab with a snap fastener, but eventually decided a button and an elastic loop would be my best bet. 

Vinyl doesn't hold hand stitching well -- the stitches just seem to tear out. I really should have affixed a square of interfacing to the underside of the cover piece before I glued it on to hold the button. Since I hadn't thought of that in time, I sewed the button in place by pushing my needle clear through the vinyl and the cardboard form and the vinyl on the other side and then back again, about twenty times. I had to use a thimble for this effort -- something I rarely do -- as it would have been too painful to push the needle through the cardboard with bare fingers.  


I crocheted a chain from the black thread elastic in order to make the button loop. It took me a few tries to figure out how to attach the elastic loop to the cover. Sewing didn't work as my stitches just tore out of the vinyl, and I couldn't think of a practical way to glue something so small and finicky. In the end I cut two squares of interfacing and used them to create a sort of glue sandwich that I could use to secure the ends of the elastic loop. Once that had dried, I glued the back of the interfacing square to the cover, after first testing its position to be sure it was situated properly to fasten the button.   


As indicated above, I'd originally planned to line the cover with a piece of satin lining. But when it proved so hard to stitch anything to the vinyl, and promised to be a time-consuming, pain in the ass, and very probably not at all successful job to sew the lining in, and I thought glue would seep through the satin lining and look bad, I opted to go for a vinyl lining. This was a much easier task, as I just had to cut a piece the right size and glue it in place. After I'd cut the piece of vinyl lining to the right size, I pinked the edges for a more finished look. 


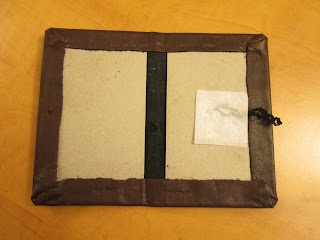
The finished project from the inside. The calculator is secured to the back flap of the cover by three strips of double-sided Scotch tape. I hope it holds, but if it doesn't, I will probably just try some stronger double-sided tape. In the old cover, the calculator was held in place by a strip of tape, and that held it in place for 26 years. 


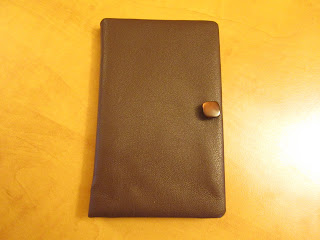
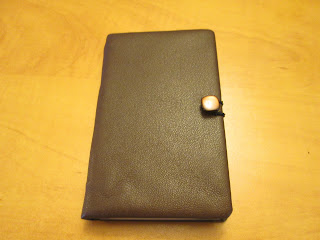
The finished calculator in all its buttoned glory. I'm pretty pleased with the result of my work on it. I don't know how long this cover will last -- I expect it to be less durable than the old one -- but now that I know exactly how to make a new one (and have documented the process, lest I forget), it'll be pretty easy for me to make another if necessary. 

I certainly like this cover better than the old one, it will coordinate well with the daily wear, convertible bag I always take to the grocery store, and this is a project that didn't cost me a penny. Can't beat that.